The Campaigns Screen
The Campaigns screen displays a list of created campaigns.
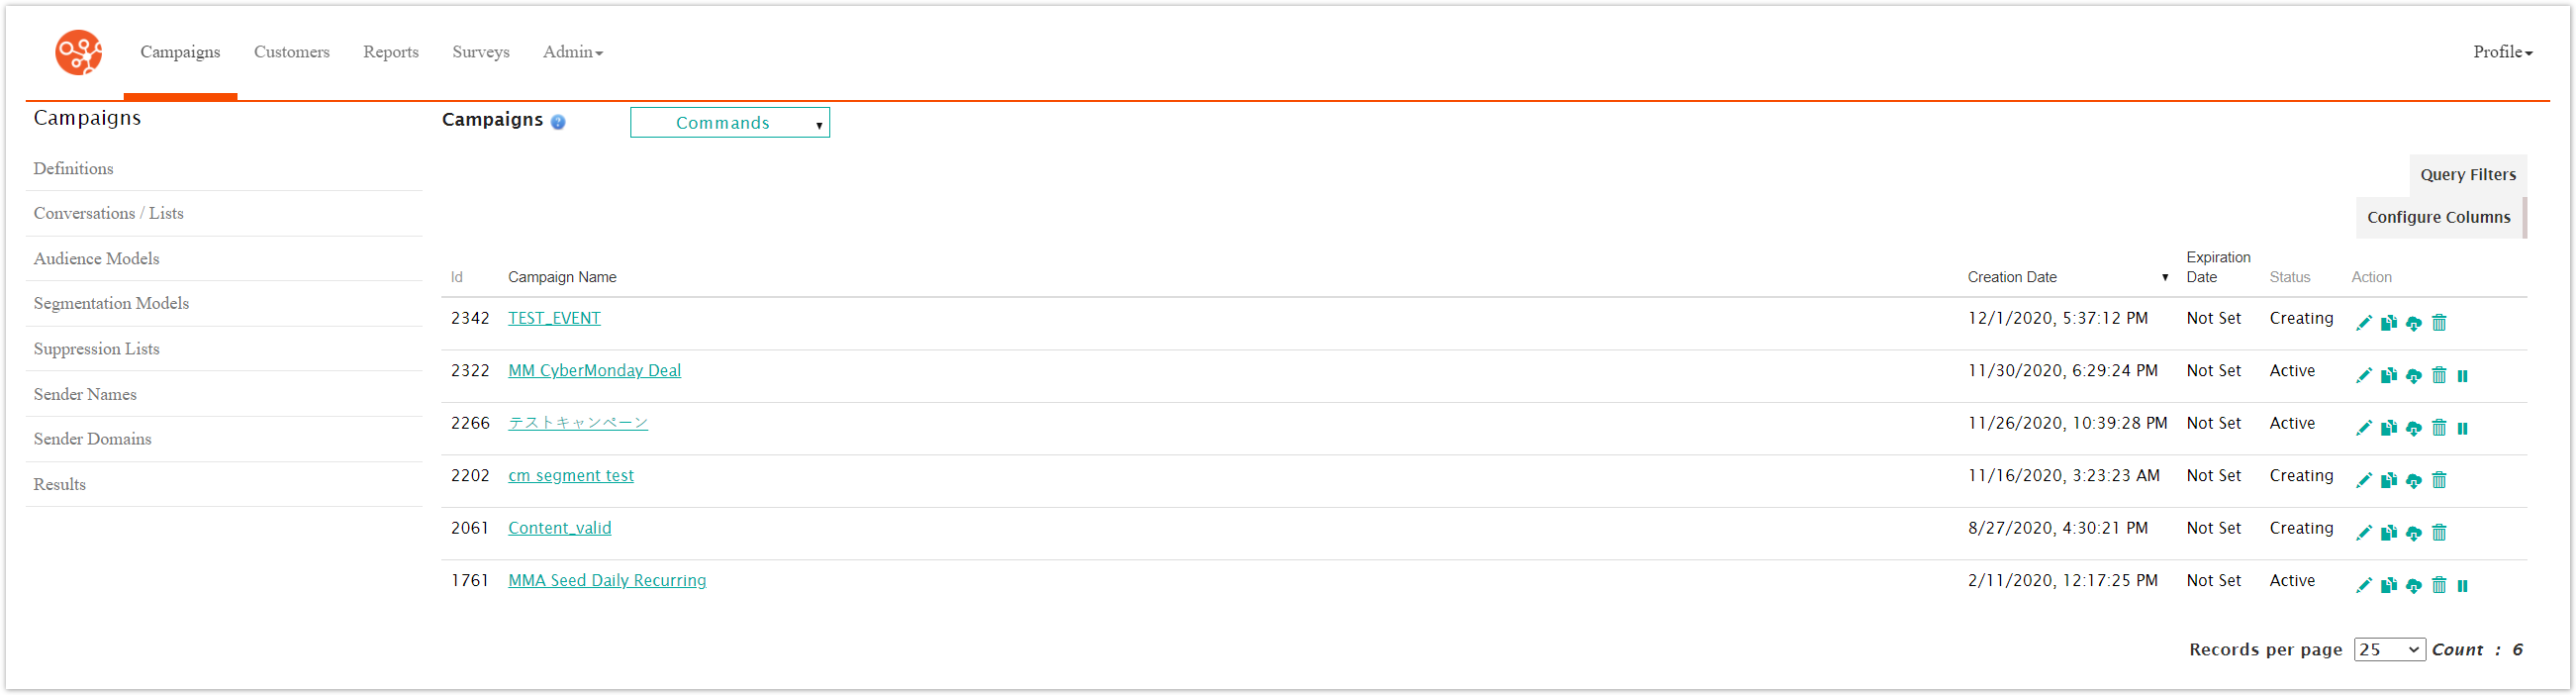
From this screen, you are able to:
Filter the list of campaigns using query filters
Sort the list using the column fields
Create a new campaign
Edit a campaign
Import a Campaign Definition stored in an XML file
Change campaign status
Delete a campaign
Searching for Campaigns
You are able to sort the list of campaigns in ascending or descending orders using the following fields:
Campaign Name: The name of the campaign, sorts in alphabetical/reverse alphabetical order
Creation Date: The date the campaign was created, sorted in newest-to-oldest/oldest-to-newest order
Expiration Date: The date the campaign expires, sorted in newest-to-oldest/oldest-to-newest order
You can also filter the list of displayed campaigns by using query filters. To use query filters:
Click the Query Filters button. The query filter fields appear.
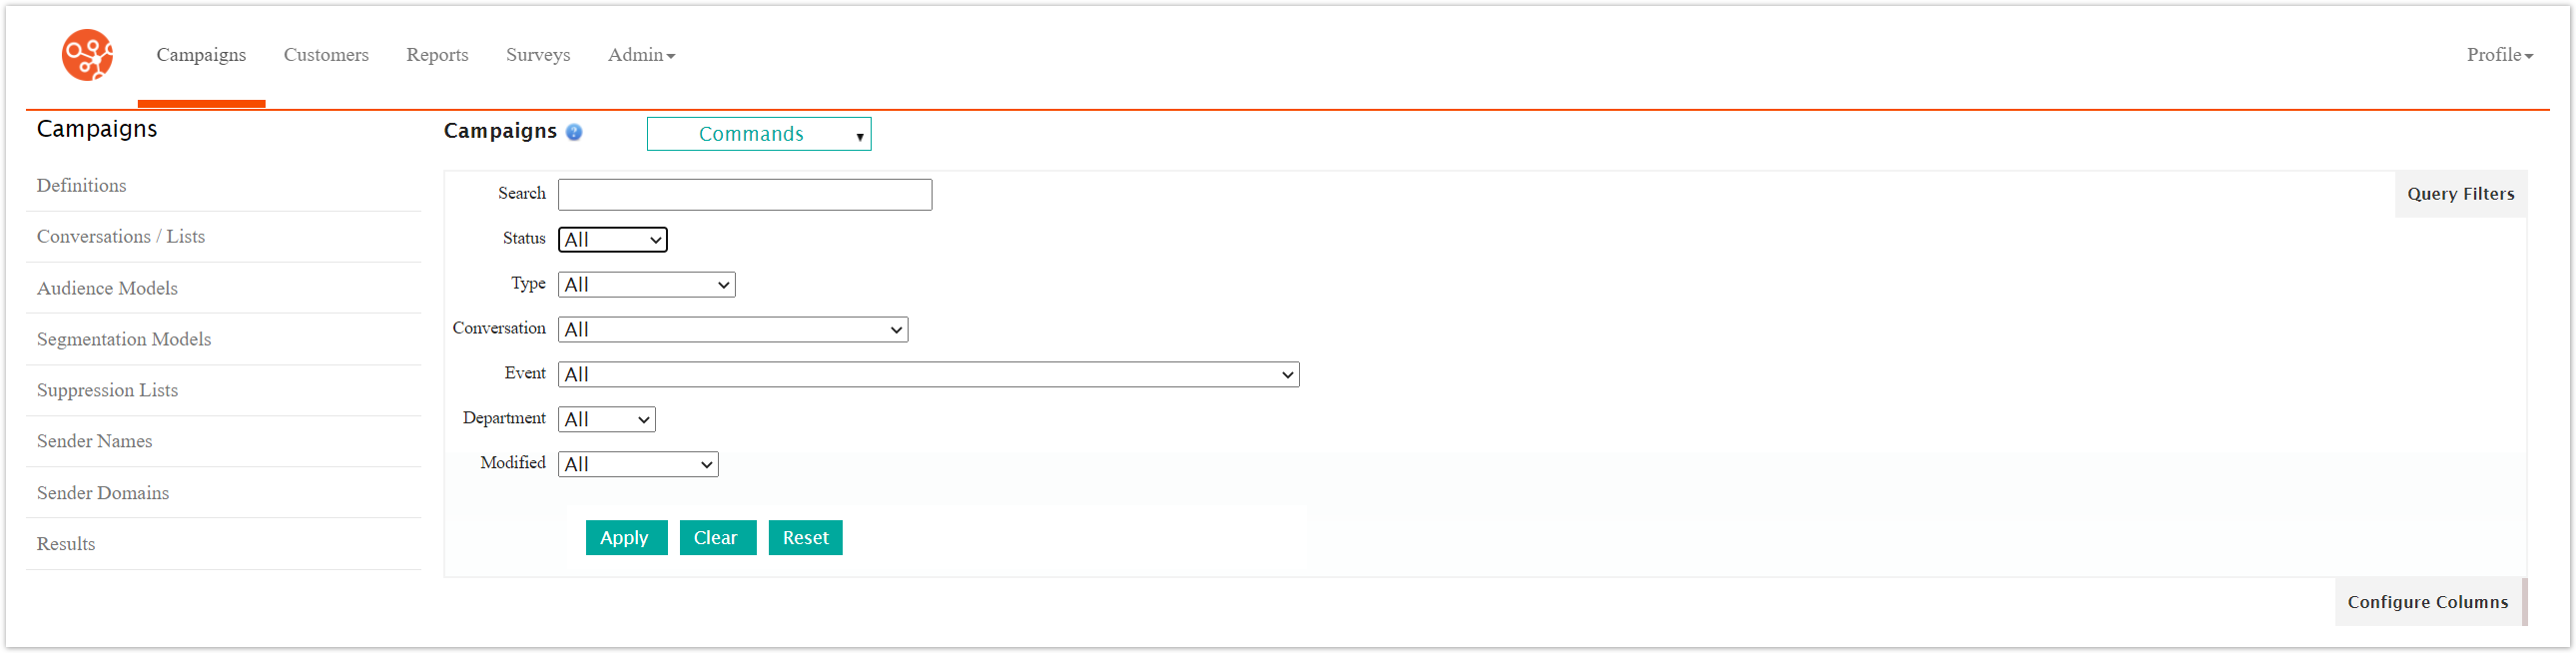
Enter the query operator and your query information into the fields:
Name: The name of the campaign. You can search for the name of the campaign using the following operations:
Contains: Campaign name contains the entered text
Does Not Contain: Campaign name does not contain the entered text
Contains (Case Sensitive): Campaign name contains the entered text, with case sensitivity
Does Not Contain (Case Sensitive): Campaign name does not contain the entered text, with case sensitivity
Equal To: Campaign name equals the entered text exactly
Not Equal To: Campaign name does not equal the entered text exactly
Is Null: Campaign name does not exist (this will provide no list of campaigns)
Is Not Null: Campaign name exists (this will provide the entire list of created campaigns)
Description: The description for the campaign. You can search for the description using the following operations:
Contains: Campaign description contains the entered text
Does Not Contain: Campaign description does not contain the entered text
Contains (Case Sensitive): Campaign description contains the entered text, with case sensitivity
Does Not Contain (Case Sensitive): Campaign description does not contain the entered text, with case sensitivity
Equal To: Campaign description equals the entered text exactly
Not Equal To: Campaign description does not equal the entered text exactly
Is Null: Campaign description is empty
Is Not Null: Campaign description exists
Status: The current status of the campaign (e.g. 'Active', 'Expired')
Conversation: The conversation associated to the campaign
Department: The department to which the campaign is associated
Modified: The time the campaign was edited (e.g., 'Last 24 Hours', 'Last 7 Days')
To clear the entered data and start over with your query, click the Clear button. The query fields are cleared allowing you to re-enter search data.
To clear the entered data and close the Query Filters fields, click the Reset button. The query fields are closed.
Click the Apply button. The list of campaigns matching your search criteria is displayed.
Configure Columns
You are able to configure the columns that appear in the Campaign screen. To Configure Columns:
Click the Configure Columns button. The configure columns field appears.

Select the columns you would like to display on the Campaign screen.
Type: the name of the type of campaign
Event: The event associated with the campaign
Conversation: The conversation associated with the campaign
Customers: The number of customers being targeted by the campaign
Audience: The audience model associated with the campaign
Segmentation: The segmentation model associated with the campaign
Suppression: The suppression list associated with the campaign
Department: The department associated with the campaign
Mail Farm: The mail farm associated with the campaign
Priority: The priority for the campaign
You can set all columns to appear in the Campaign screen by pressing the All button.
You can set none of the columns appear besides the default by pressing the None button.
Click the Apply button. The selected columns will be displayed.
Other Campaign Actions in the Campaign Screen
There are several high-level actions that you are able to perform from the Campaigns screen for the campaign listed. You can find these actions in the Action column of the displayed campaigns. You are able to perform the following actions on a campaign:
Edit: (
 ) You are able to edit the components of a campaign if you discover that the configured aspects of the campaign are incorrect or need adjusting.
Note: Campaigns that are in an 'Active' state will need to be unlocked in order to be edited.To edit the campaign:
Click on the Edit icon (
) beside the desired campaign. The Campaign Properties screen displays.Edit the campaign as needed.
To save the campaign and remain on the current Campaigns screen, click the Save button. The campaign is saved.
To advance to the next campaign configuration screen, click the 'Next Screen' icon (
 ). The campaign is saved and you are navigated to the next campaign configuration screen.
To return to the previous campaign configuration screen, click the 'Previous Screen' icon (
 ). The campaign is saved and you are navigated to the previous configuration screen.
Clone: (
 ) You are able to save time by cloning campaigns similar to a campaign that you wish to create. Once cloned, you can edit the aspects of the campaign that are different from the original and launch the campaign.
To clone a campaign:
Click on the Clone icon (
). Connect displays the confirmation notice for the campgin clone command.
To cancel the clone operation, click the Cancel button. You are returned to the Campaigns screen.
Click OK. The copy of the cloned campaign displays in the list of campaigns.
Note: The naming convention for the cloned campaign is Copy of [name of cloned campaign](ID=###). This name can be changed by editing the campaign.
Export Campaign: (
 ) You are able to export your campaign to XML if you wish. The output can be parsed by any downstream system that uses XML.
To export a campaign to XML:
Click the Export Campaign icon (
). The campaign is downloaded in the browser.Open the folder on your computer where your browser downloads files. There will be an XML file that is the export of the campaign. The file uses the naming convention [name of campaign].xml.
Delete Campaign: (
 ) If a campaign has been created by mistake or is no longer needed, you are able to delete the campaign so that it no longer displays in the Campaigns screen.
To delete a campaign:
Click the Delete icon (
). Connect displays the confirmation notice for the campgin delete command.
To cancel the delete operation, click the Cancel button. You are returned to the Campaigns screen.
Click OK. The Campaigns screen is displayed with the deleted campaign no longer displayed.
Note: You cannot delete staged campaigns with an Active or Expired status.
Pause Campaign: (
 ) When a campaign is launched and active, you are able to pause the campaign so that no messaging activity occurs.To pause an active campaign:
Click the Pause Campaign icon (
 ). Connect displays the confirmation notice for the campgin pause command.
To keep the campaign active and not pause it, click the Cancel button. You are returned to the Campaigns screen.
Click OK. The campaign is displayed with the status 'Paused'.
Resume Campaign: (
 ). When a campaign is paused, you are able to resume the campaign so that sending activity resumes.To resume the campaign:
Click the Resume Campaign icon (
) button. Connect displays the confirmation notice for the campgin resume command.
To keep the campaign paused and not resume it, click the Cancel button. You are returned to the Campaigns screen.
Click OK. The campaign is displayed with the status 'Active'.