Event-Triggered Campaign - Targeting Tab
The Targeting tab is one of three tabs that appear after saving the base information for the event-triggered campaign. This tab is where you define the conversation and define the segmentation model. By default, the Audience Model for event-triggered campaigns is All Active Subscribers.
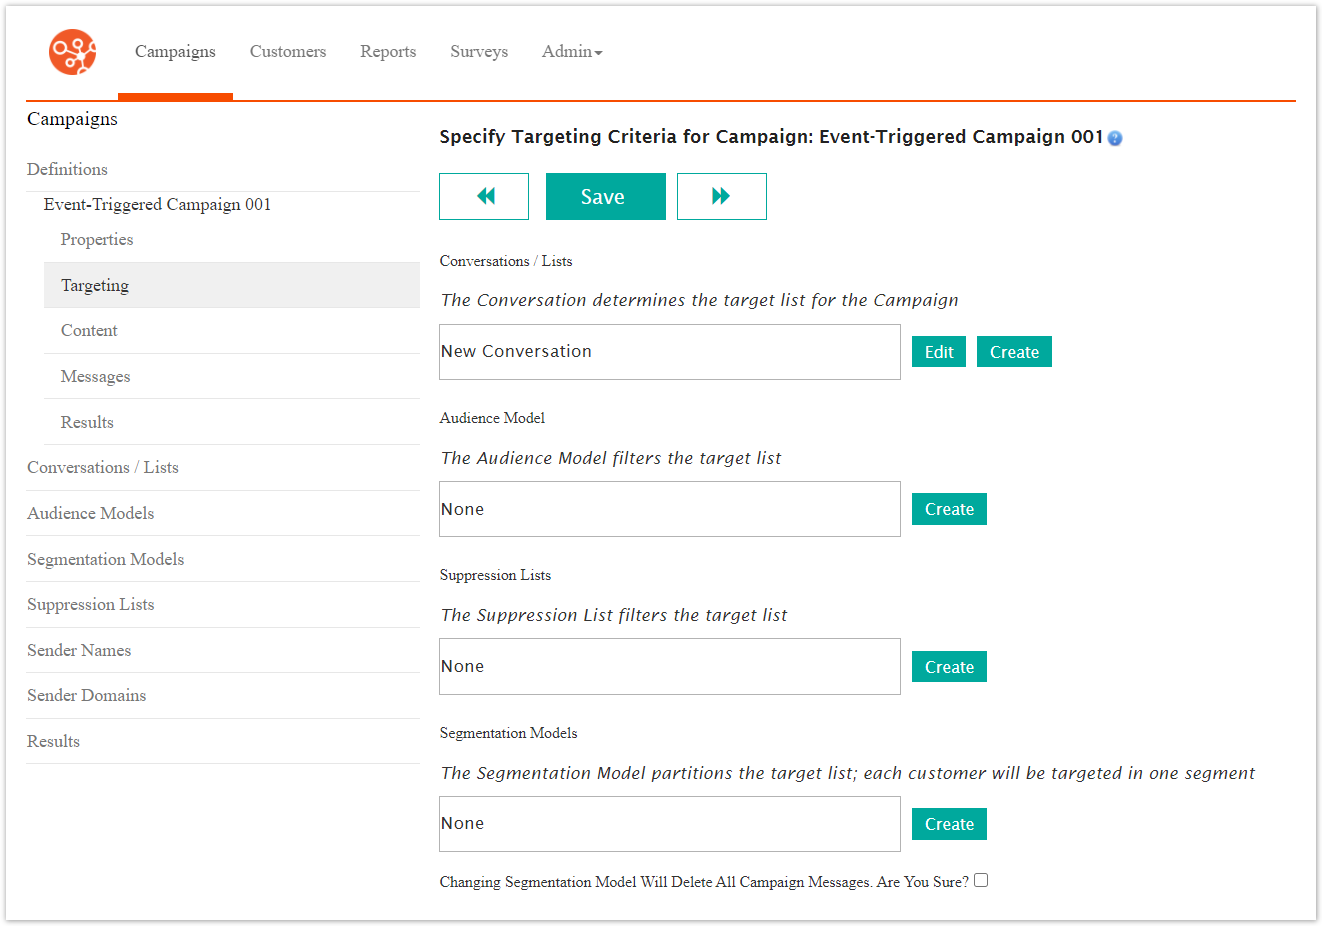
This procedure is covers how to add or edit a Conversation and the Segmentation model.
Create New Conversation
Though you can use an existing conversation, there might not be a conversation that works for your campaign. In that case, you must create a new conversation. Follow these directions to create a new conversation.
In the Conversation section, click the Create button. The Add Conversation screen appears.

Complete the fields on the Add Conversation screen. For details about completeing the conversation, see the Conversations topic.
Click the Save button. The conversation is saved and the Specify Targeting Criteria screen appears.
Click the Save button to complete the information later or continue defining targeting criteria.
Add Existing Conversation
Conversations are how you communicate with your customers. Conversations are reusable or you can create a new conversation. Follow these directions to create a new conversation.
In the Conversation section, double-click in the Conversation field. A list of conversations appears.
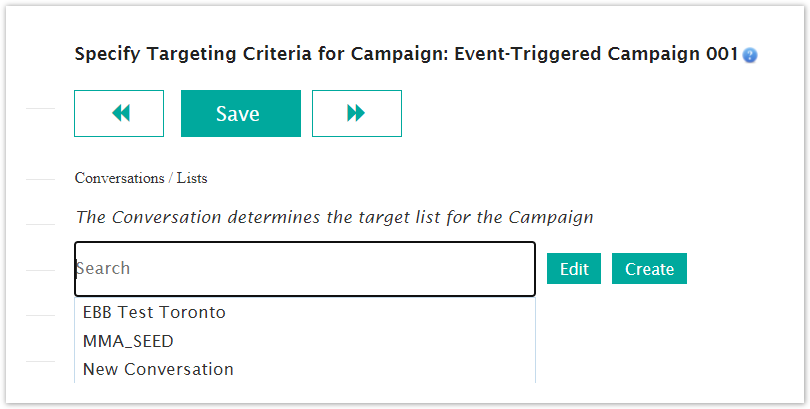
From the list of converstions, select the appropriate conversation. The new converstion appears in the field.
Click the Save button to complete the information later or continue defining targeting criteria.
Edit Existing Conversation
After selecting an existing conversation, you can make changes to a conversation, including changing the name. Follow these directions to edit an existing conversation.
In the Conversation section, click the Edit button. The Edit Conversation screen appears.

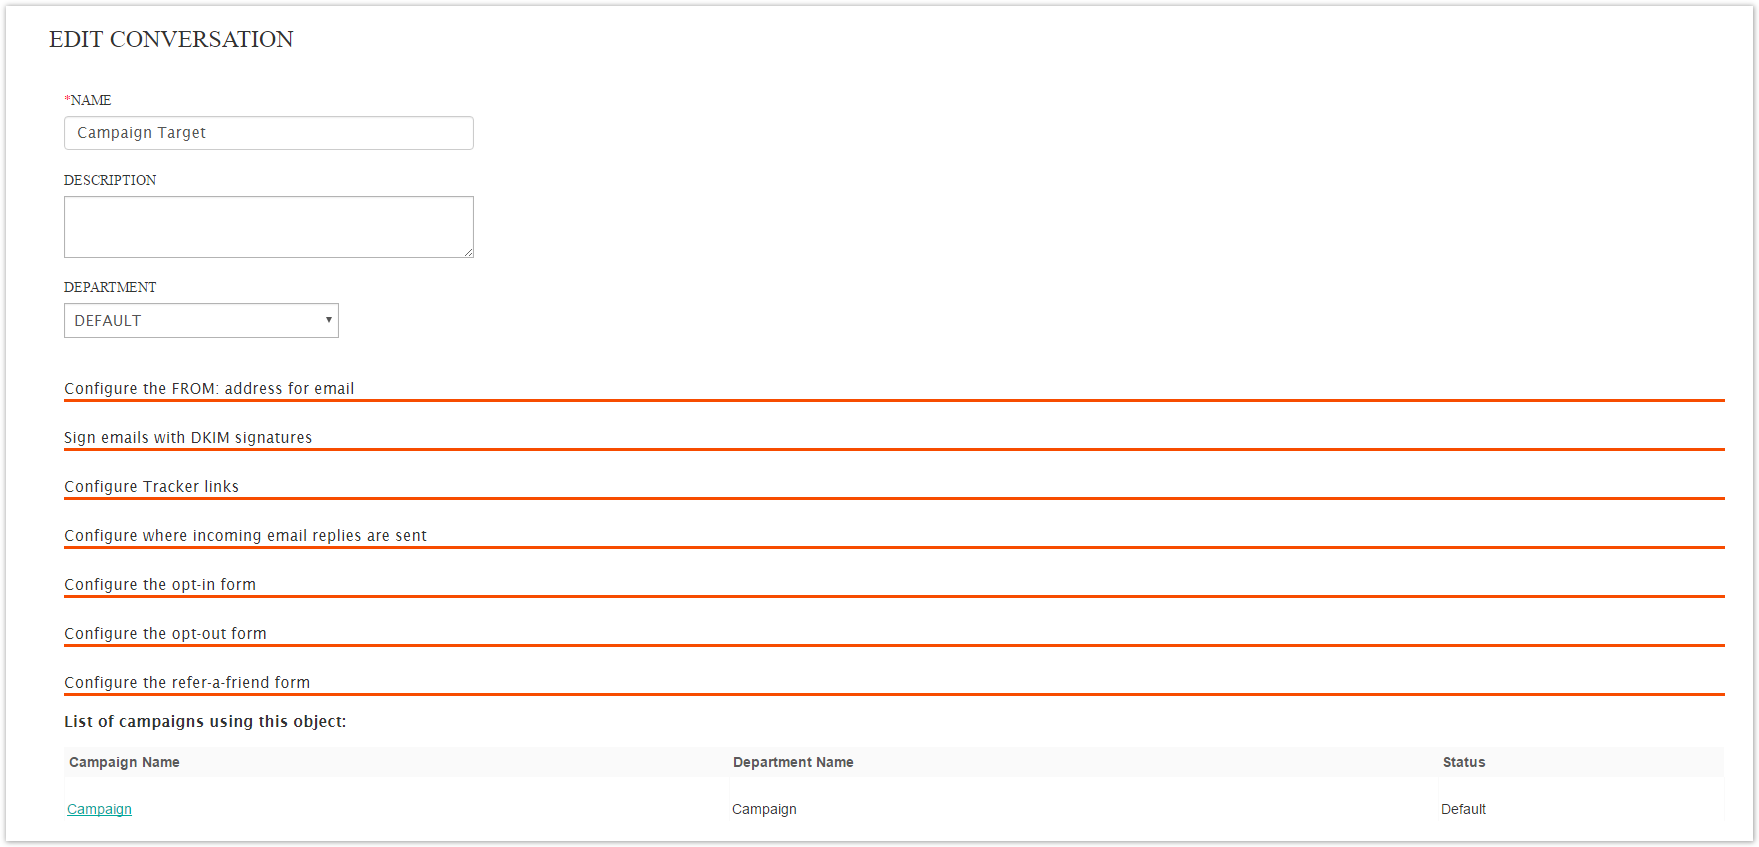
Make your changes.
From the Edit Conversation screen, click the Save button. The Specify Targeting Criteria screen appears.
From the Specify Targeting Criteria screen, click the Save button to save the conversation.
Segmentation Models
A Segmentation Model divides your audience into groups called segments. Customers are placed in one segment and never qualify for more than one segment. If a customer is qualified for more than one segment, that customer is placed in the first segment for which they qualify.
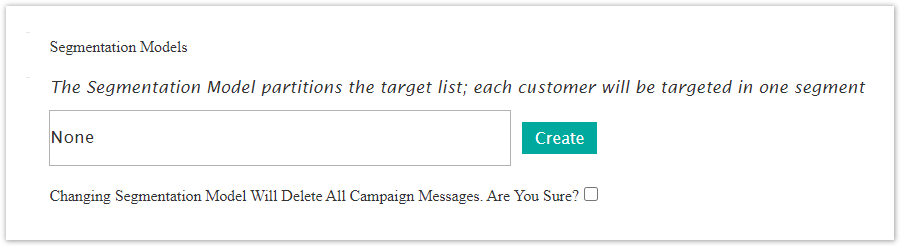
Every segmentation model automatically has a Leftovers segment except when you choose random equal size segments. Leftovers include all customers who do not fit into any other segment model. This ensures that all customers in the campaign's audience are included in exactly one segment. After defining the segments, you can define a specific message for each segment.
Segmenting your campaign audience allows you to send different messages to different segments. The segments are broken down for easy comparison in the Reporting module. You also have the option to send the same message to all segments. In this case, segmentation is solely a reporting aide used to compare responses from different customer groups.
There are two benefits to using segmentation models in your campaigns. First, you can target different messages to different groups. Second, you can break down campaign reports by segment, so you can measure and compare the behaviors of different segments. You can use a segmentation model even if you are sending the same message to the entire campaign audience.
With segmentation models you can break down your audience by:
Customer Attributes – Gender, home state, or favorite sport
Customer Behavior – Define a segment made up of customers who have clicked at least one link in the messages sent in the past quarter.
Random Customer Segmentation – Allows you to do A/B testing, to see how random samples react to different messages.
Select Existing Segmentation Models
It is possible an existing segmentation model exists that will meet your needs. In that case, you can choose a segmentation model to assoiciate with your campaign. Follow these directions to select an existing campaign.
In the Filtering and Segmentation Model section, double-click in the Segmentation Model field. A list of segmentation models appears.

Click the segmentation model you want to use. The selected model appears in the field and the Edit button appears at the end of the field.
Click the Edit button to make changes if necessary.
Click the Save button to save the information on the Targeting tab.
Create Segmentation Models
Follow these directions to add one or more segmentation models.
In the Filtering and Segmentation Model section, by the Segmentation Model field, click the Create button. The Create Segmentation Model screen appears.
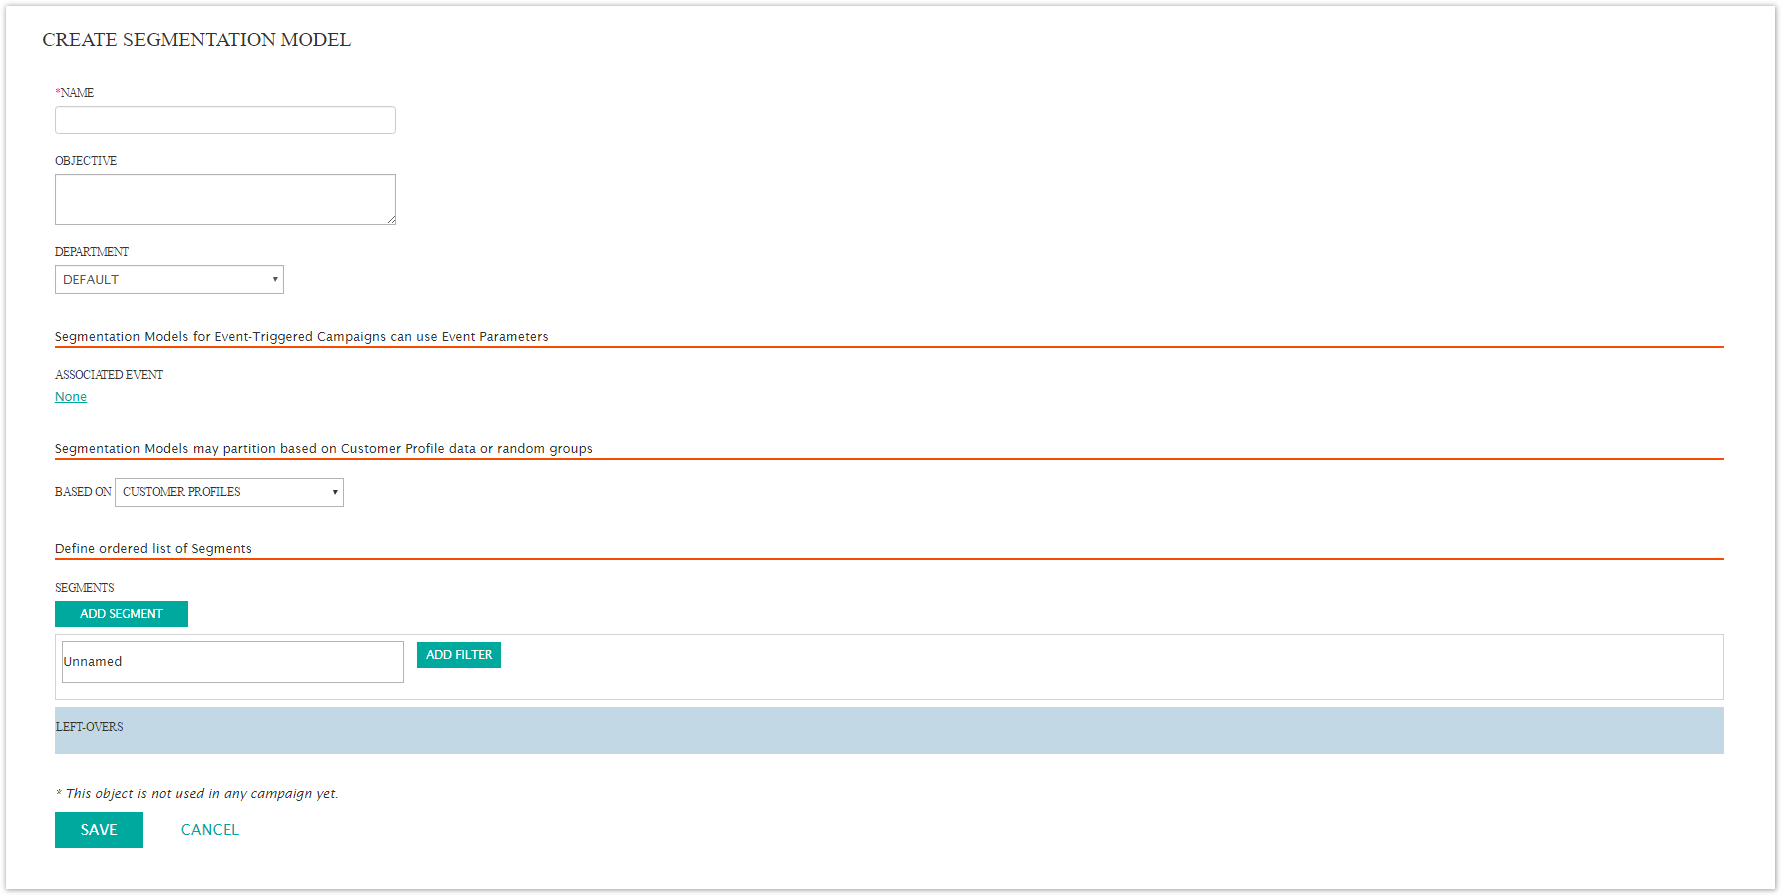
In the Name field, type a unique name for the segment.
In the Objective field, type a short description of the segment.
From the Department drop-down list, select a department or keep the default department.
In the Segmentation Models for Event-Triggered Campaigns can use Event Parameters section, Associated Event field, click the link. The screen expands to display a list of event-triggered campaigns.
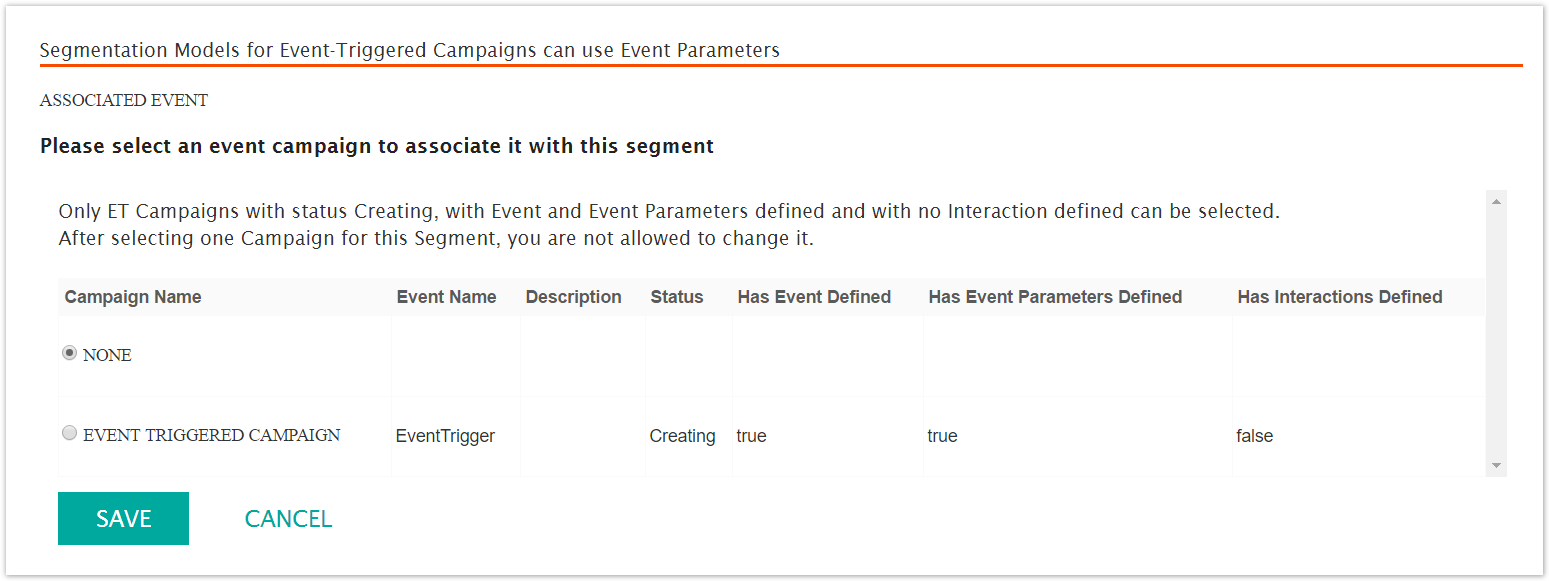
In the Please select an event campaign to associate it with this segment, click the radio button beside the event-triggered campaign you want to use.
Click the Save button. The screen contracts and the campaign name appears beside the Associated Event field.
In the Segmentation Models may partition based on Customer Profile data or random groups section, from the Based On drop-down field. select how you want to segment the audience. The fields below this section change based on your selection.

Define the segments. (The specific directions for each segmentation selection appear below.)
Click the Save button. The Specify Targeting Criteria screen appears.
Segmentation Models may partition based on Customer Profile Data or random groups
When you select a segmentation type, the section and fields below the the Based On field change based on your selection. The segmentation model options include the following:
Customer Profiles.
Equal sized segments randomly selected.

Custom sized segments randomly selected.

The following table identifies the fields that appear based on the segmentation model you select.
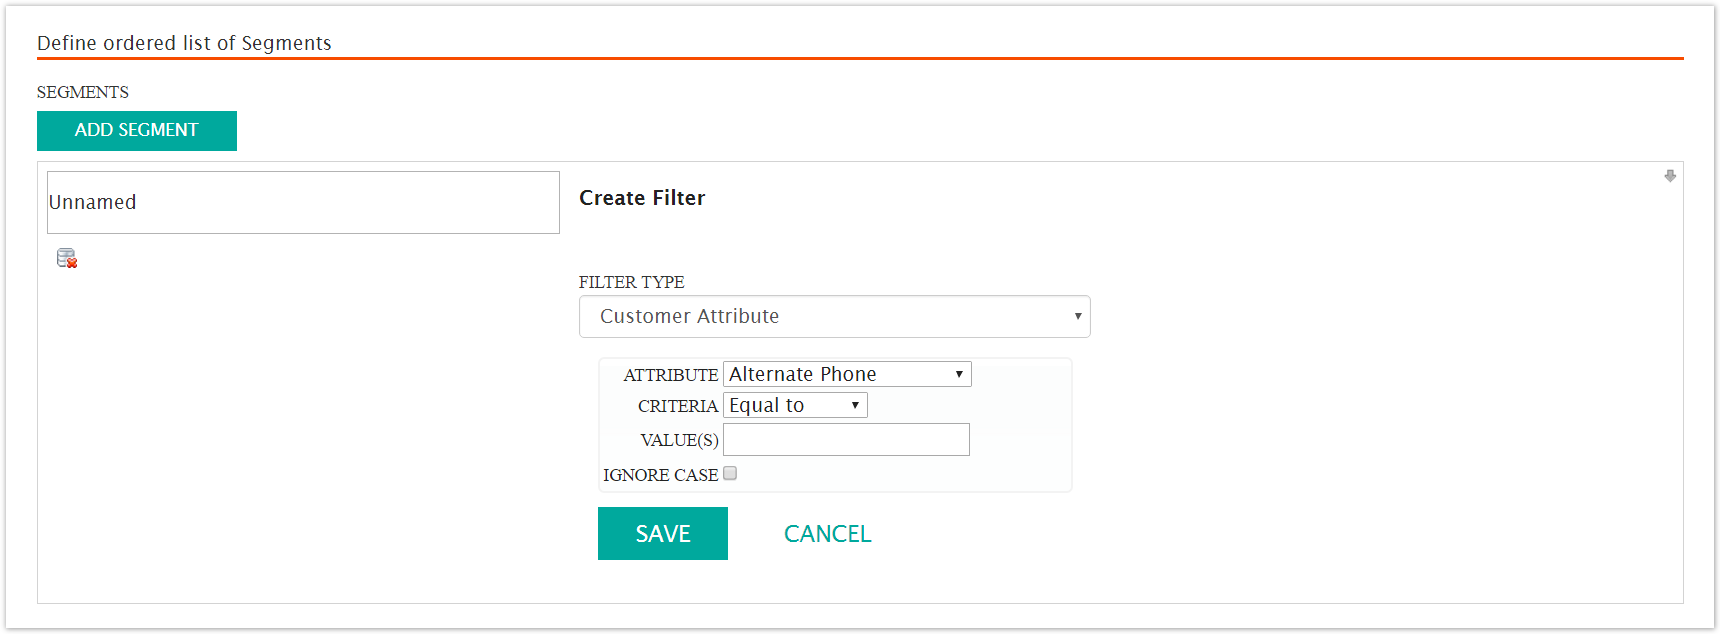
Customer Profiles
When you add new segments, the table expands to display filter options. Each filter option you select displays different fields. Add as many segments as you need. The options and associated fields appear in the following table.
|
Filter Type |
Fields and Field Type |
|
Customer Attribute |
Attribute -Drop-down list Criteria - Drop-down list Values - Text field Ignore Case - Check box |
|
Recency Statistics |
Recency of last - Drop-down list Criteria - Drop-down list Value(s) - Text field Days - Text field and drop-down field |
|
Frequency Statistics |
Frequency Metric - Drop-down list Criteria - Drop-down list [Operator drop-down list] Value(s) - Text field |
|
Monetary Value Statistics |
Monetary Value of - Drop-down list Inferred Interest - Drop-down list Criteria - Drop-down list [Operator drop-down-list] Value(s) - Text field |
|
User Agent |
No fields |
Equal sized segments randomly selected
In this segmentation model, the audience is automatically segmented equally by Connect. Selecting this option displays two segments by default. You can add up to 18 more segments for a total of 20 segments. Segment names default to 1/2 and 2/2 and if you add more segments, the second number changes. For example if you want six segments, the default name is 1/6, 2/6 and so on.
Do the following to make changes to the segments.
In the Number of segments (between 2 and 20) field, type the segment number and click the Set button. The new segments are added.
Type a name in the segment field.
Custom sized segments randomly selected
In the custom sized segment option, you define the segment name and the segment size as a percentage. Leftovers are automatically calculated. Do the following to make changes.
Click the Add Segment button to add more segments.
In the Unnamed field, type a segment name.
In the Percentage field, type a percentage number in the field.
Click the delete icon
 to remove a row.