Editing Dashboards
Once a dashboard is created, you are able to edit the dashboard attributes.
Editing Dashboards
To edit a dashboard:
Navigate to the Dashboard screen.
Select the desired dashboard from the Dashboard dropdown.
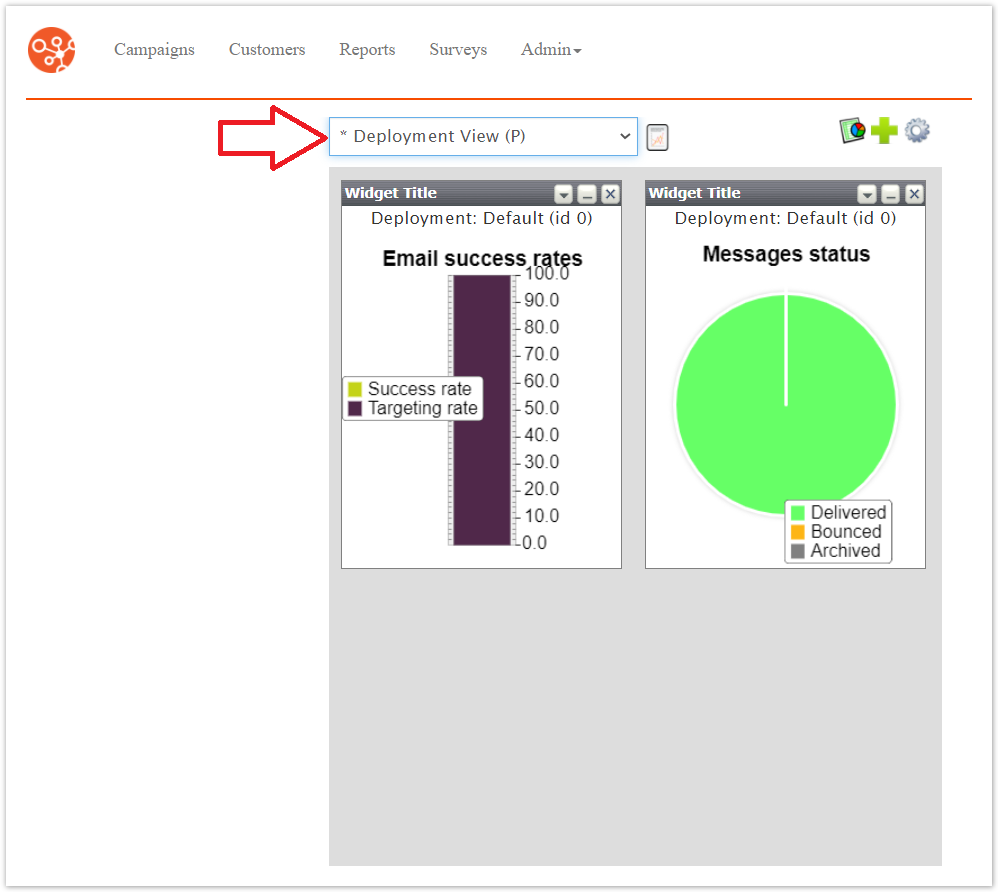
The desired dashboard displays.
To edit the details of the dashboard itself:
Click the Edit Dashboard icon (
 ).
).The Edit Dashboard screen displays.
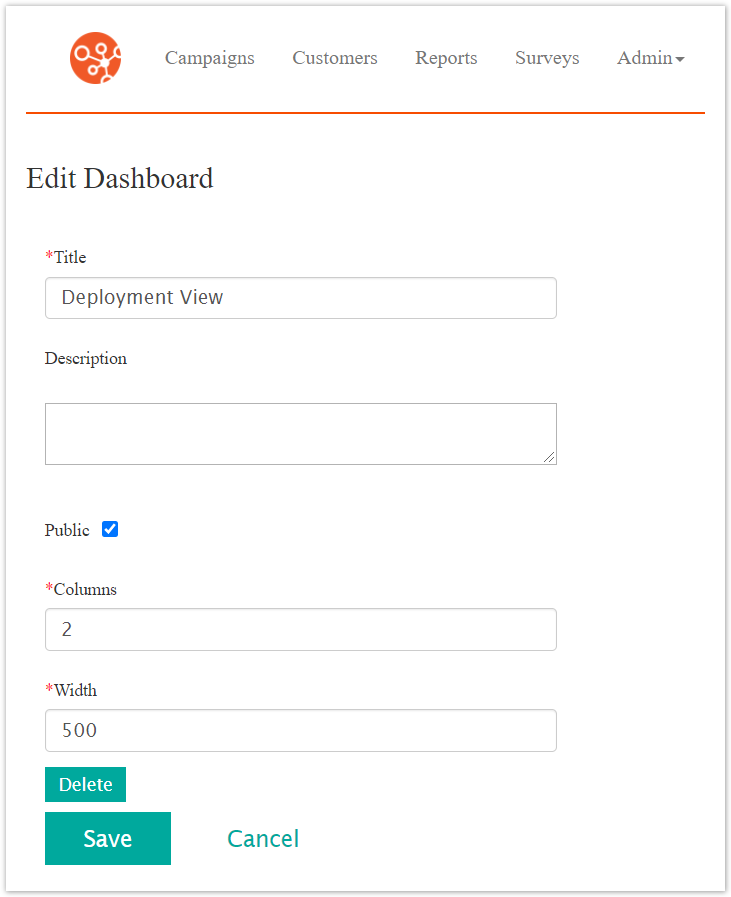
Edit the dashboard properties:
Title: The title for the dashboard
Description: A description for the dashboard
Public Flag: If checked, the dashboard is made public to other Connect users. They will be able to select the dashboard from their list of dashboards
Columns: The number of columns that will display in the dashboard. Report and statistical widgets are able to be added to the columns
Width: The width of the dashboard in pixels
Note: The width of the dashboard is a fixed value so that the columns will be uniformly displayed in the dashboard. You may wish to adjust the width to accommodate the number of columns appropriately. 200 pixels per columns is recommended.
To cancel without saving the new dashboard, click the Cancel Button.
The Dashboard screen displays. The dashboard is not saved.
Click the Save button.
The Dashboard screen displays, displaying the newly created dashboard.
To edit the individual widgets on the dashboard:
Click the Configure This Widget icon (
 ).
).The widget details display.
Edit the widget details as needed. For more information on the specific details of the different widget types, please see Creating Dashboards.
To cancel without saving changes to the widget, click the Cancel button.
The dashboard displays without any changes made to the widget.
Click the Save button.
The dashboard displays with the changes to the widget saved.
To show or hide a widget, alternately click the Hide (
 ) and Show (
 ) icons.
To remove a widget from the dashboard:
Click the Remove Widget icon (
 ).
).The confirmation message to remove the widget displays.
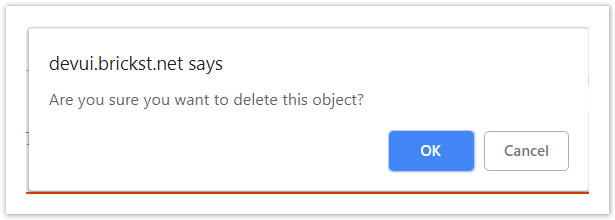
To cancel without removing the widget, click the Cancel Button.
The desktop displays with the widget remaining.
Click the OK button.
The desktop displays with the widget removed from the dashboard.