Creating User Profiles
Prior to using the system, a Connect user must have a user profile created for them that is associated to them. Once the user logs into their user profile, they will have access to Connect according to their associated profile.

Creating a New User Profile
To create a new user profile:
Navigate to the Company Admin screen.

Click on the User Management sub-menu in the menu bar on the left, followed by the Users menu option. The Users screen appears.
From the Commands dropdown, select New User.

The Enter User Information screen appears.
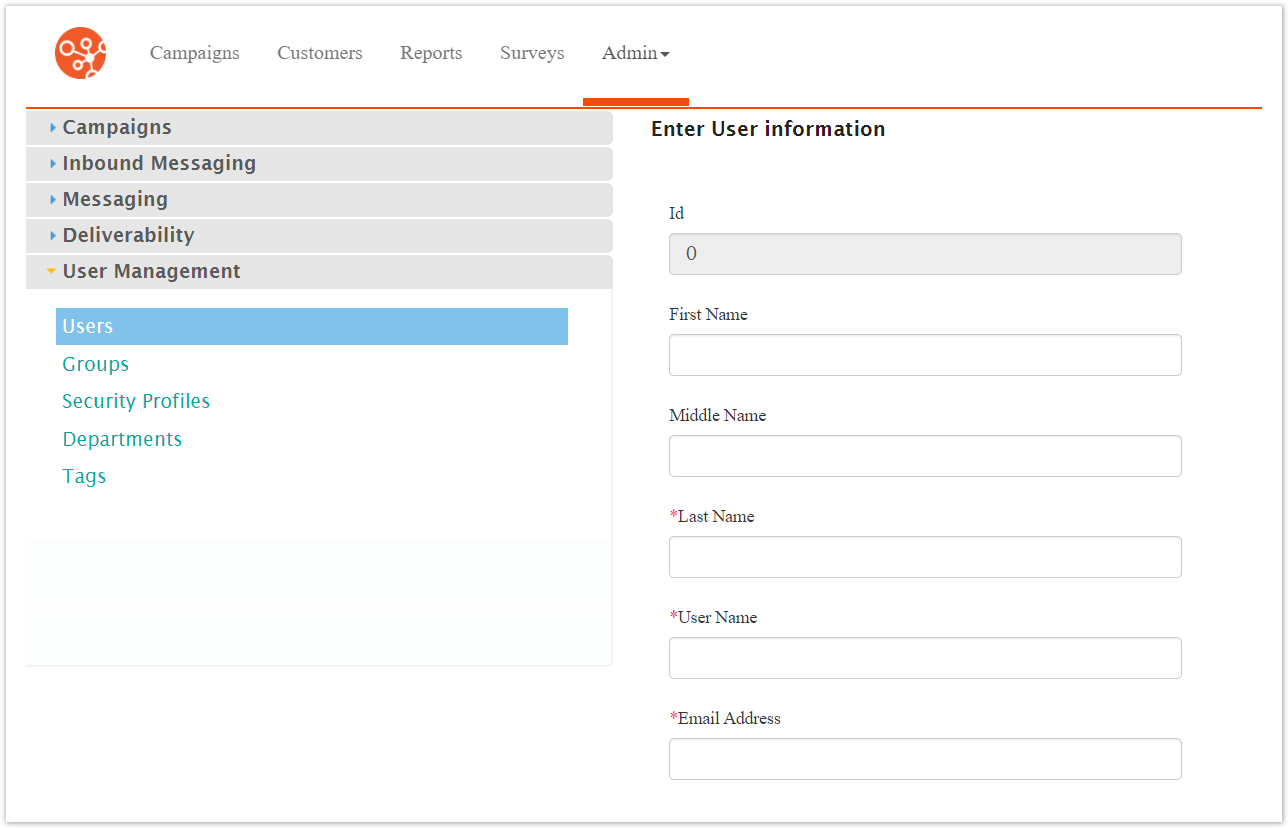
Enter the user profile information:
First Name: The user's first name
Middle Name: The user's middle name
Last Name: The user's last name
Login Name: The name the user will use, and will be known as, in Connect
Email Address: The user's email address
Alternate ID: An alternate identifier for the user (e.g. login name in legacy system)
SMS Number: The SMS or mobile phone number or the user
Password: The password the user will enter to access Connect
Confirm Password: The confirmation for the password to ensure that the password is entered correctly
Departments: A series of checkboxes indicating which departments the user is associated to
Security Profiles: The security profile that is associated with the user
Default Department for Security Profile: The user's default department which will be used under the associated security profile
Disabled: Indicates whether the user is disabled and not active in Connect or not
Seed List: Indicates whether the user is associated to a seed list or not
Failed Login Attempts: This is a display-only field indicating the number of failed logins the user has performed
To cancel without saving the user profile, click the Cancel button. The Users screen displays. The user profile is not saved and does not appear in the list of users.
Click Save. The Users screen appears with the newly created user profile saved and added to the list.