Configuring the APNS Delivery Channel
In order to use the APNS delivery channel and push notifications to Apple products, the APNS delivery channel must be configured.
Configuring the APNS Delivery Channel
To configure the APNS delivery channel:
Navigate to the Company Admin screen.

Under the Campaigns sub-menu in the menu bar on the left, click on the Delivery Channels menu item. The Delivery Channels screen appears.
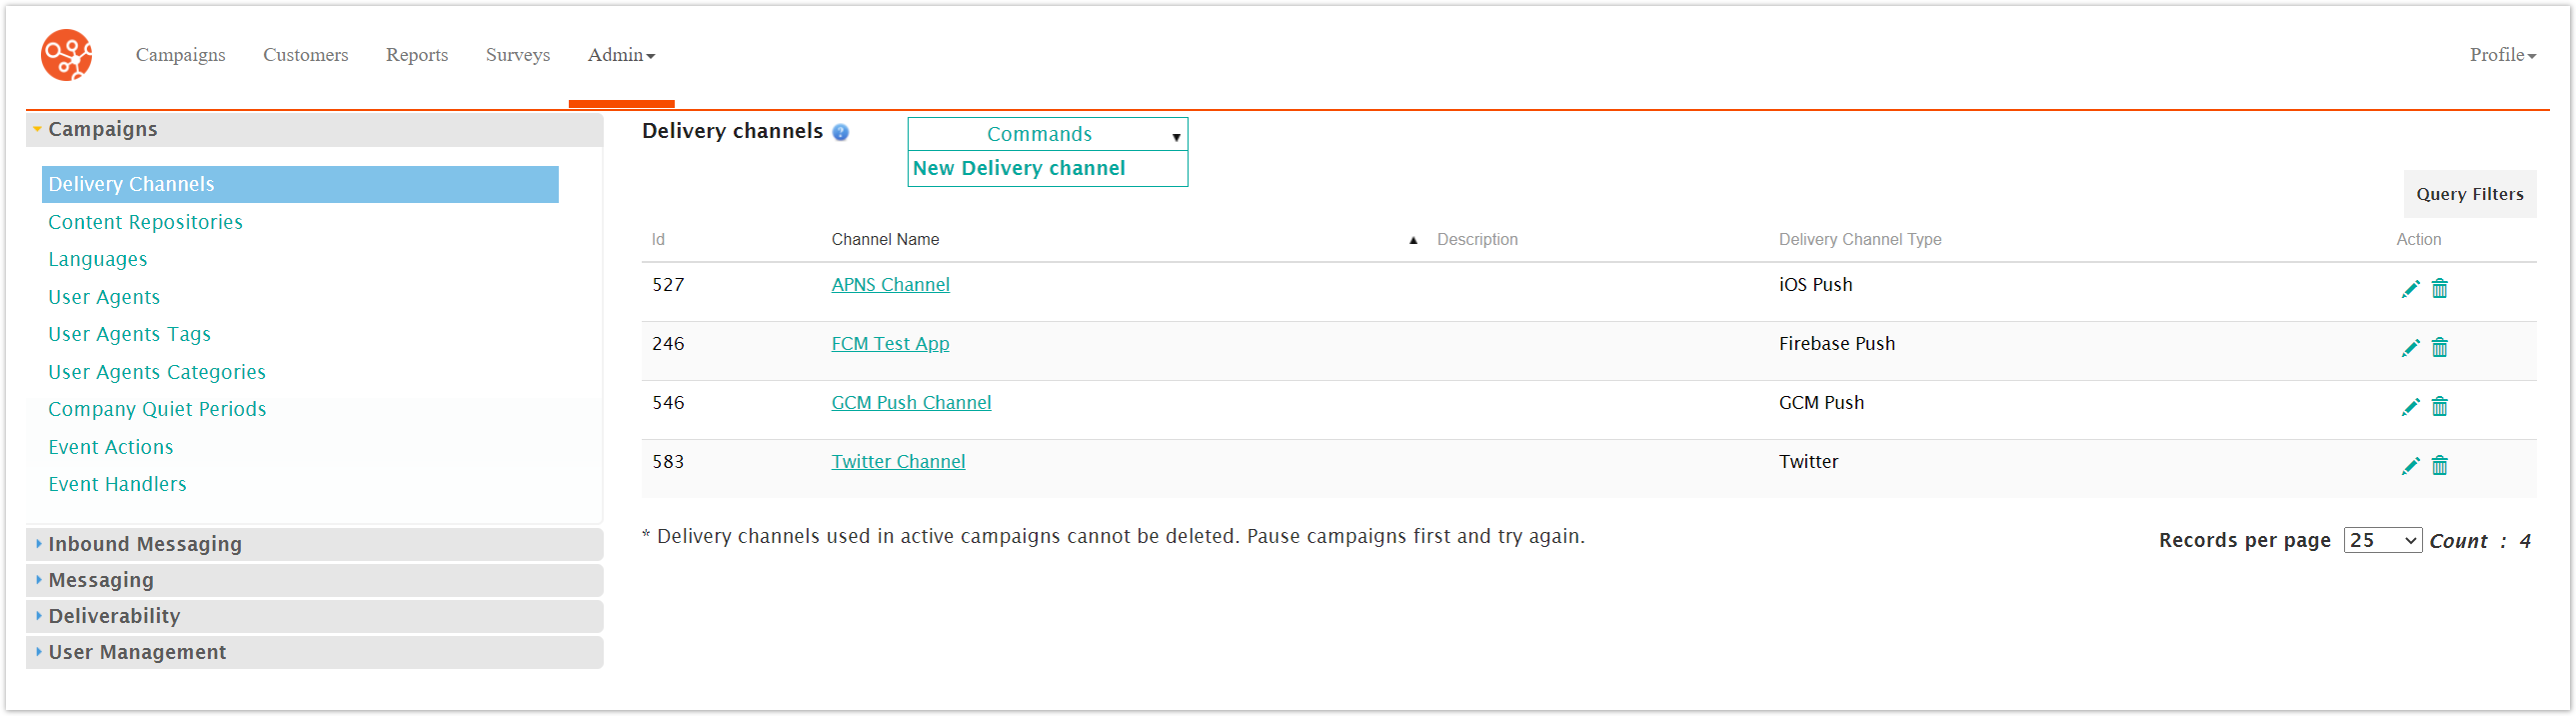
From the Commands dropdown, select New Delivery Channel.
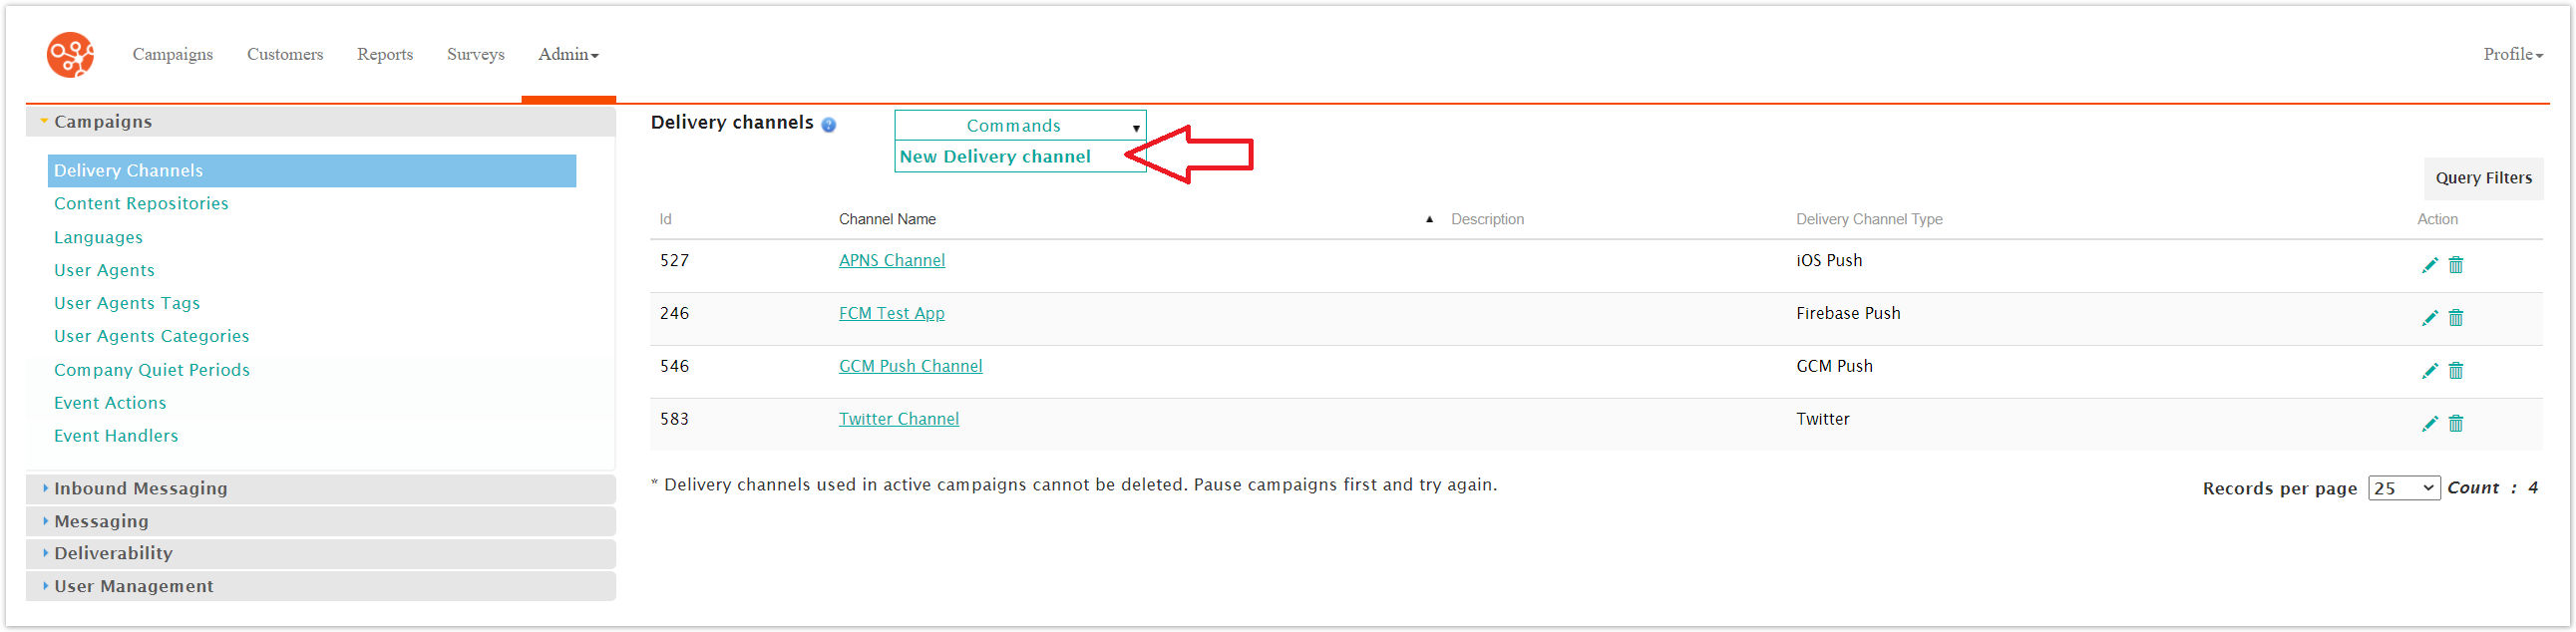
The Configure Delivery Channel screen appears.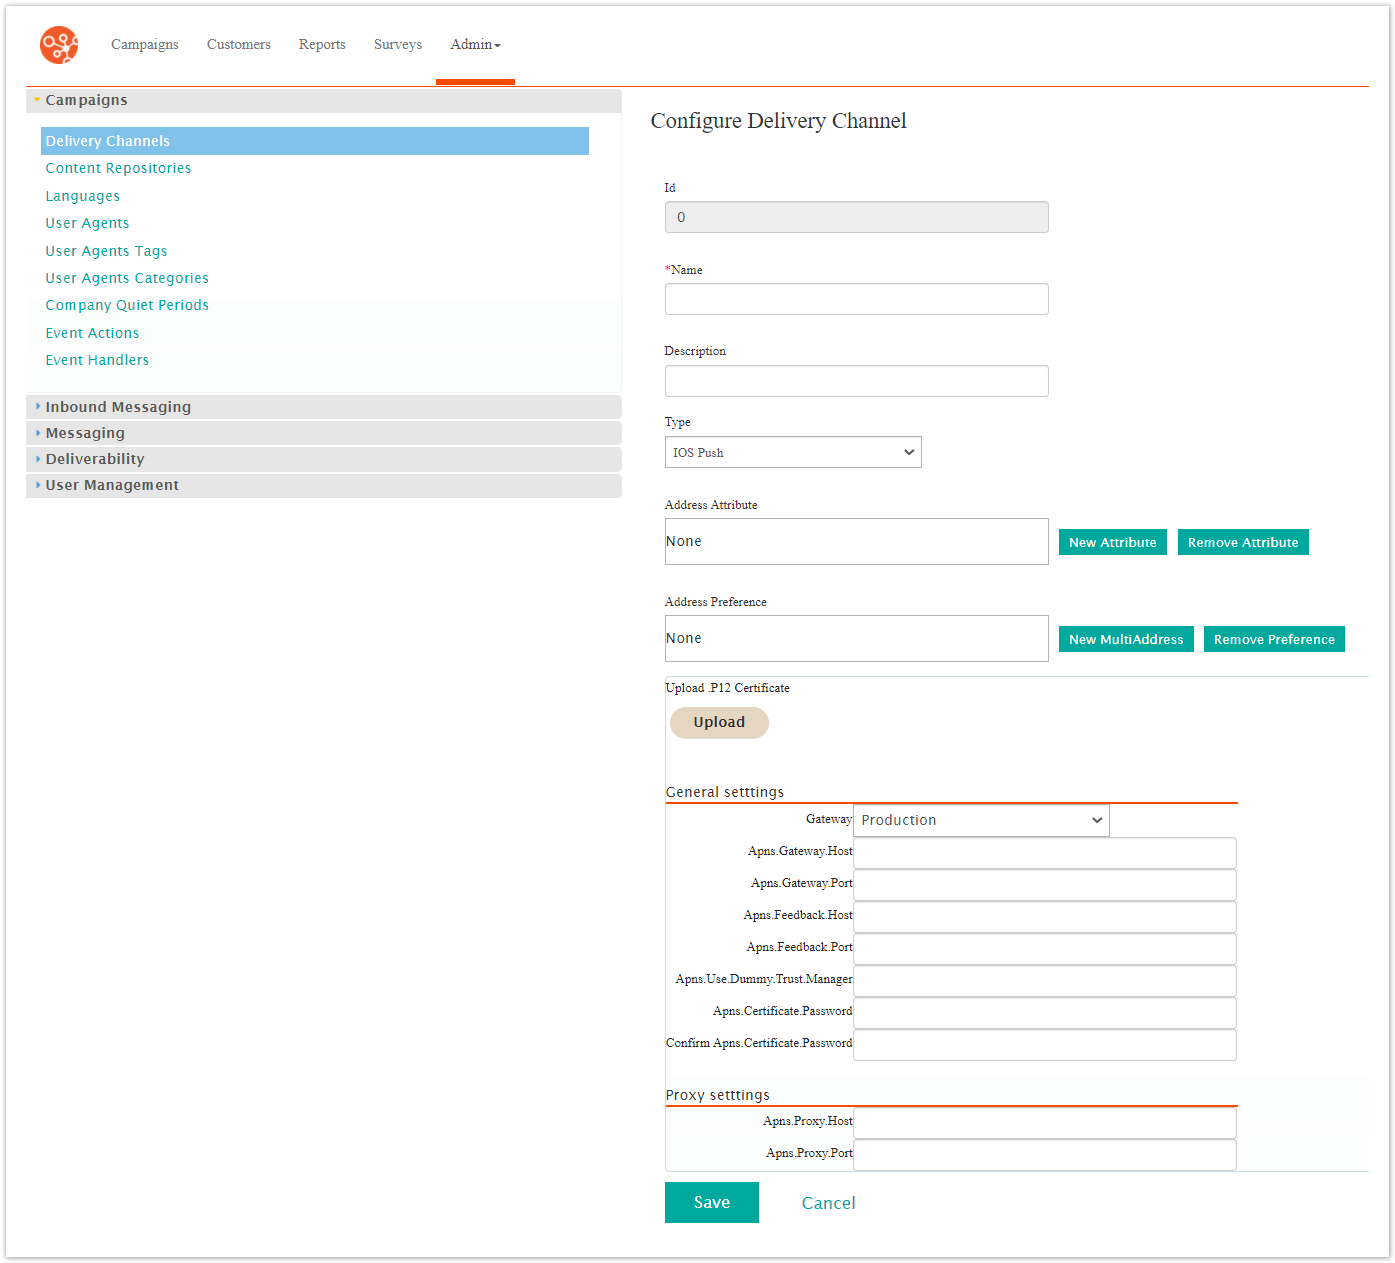
Enter the delivery channel details:
Name: The name for the delivery channel
Type: Select 'IOS Push'
Enter the desired customer attribute that contains the iOS device token for the mobile application in the Address Attribute ID field. For more information on adding attribute-specific information in the Address Attribute ID field, please see Creating Delivery Channels.
Click the Upload button to upload the certificate used to connect to the APNS servers. The certificate is downloaded from the Apple iOS Provisioning Portal and converted to a .p12 file. For more information on uploading certificate files, please see Creating Delivery Channels.
Note: The Java cryptography libraries require the .p12 certificate file to have a password.In the Proxy Settings section, select the desired gateway in the Gateway dropdown (Production, Sandbox, Custom).
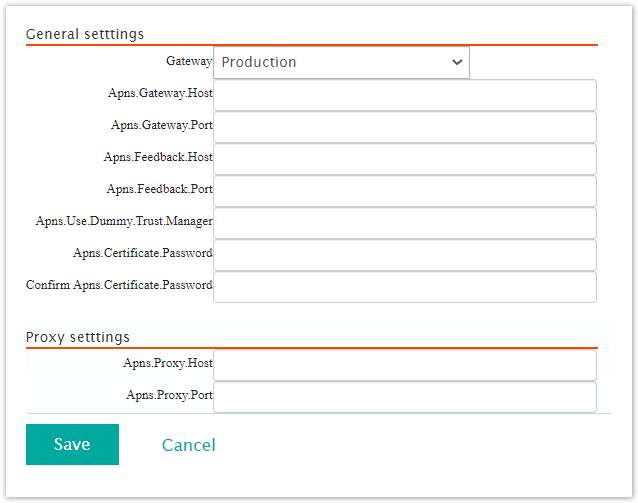
If the delivery channel will use a proxy setting to connect to APNS servers, enter the remaining proxy settings in the Proxy Settings section.
To cancel without saving the delivery channel, click the Cancel button. The Delivery Channels screen appears without saving the delivery channel.
Click the Save button. The Delivery Channels screen appears with the IOS Push delivery channel displayed in the list of delivery channels.