Configuring Bounce and Reply Handling Messages
Once a message is created and associated with a segment, Connect allows you to configure bounce and reply handling settings. In the event of a bounce or customer reply to the sent message, Connect allows you to configure a message that will be triggered by a qualifying event and sent to the user, or other body as necessary.
Note: You are able to create a separate bounce campaign that will be triggered by an event, or use an existing event-triggered event to send the message to the user as necessary.
Configuring the Bounce and Reply Handling Settings for Messages
To configure the bounce and reply handling settings for an existing message:
Navigate to the Messages screen for the desired campaign.

Select the desired message in the Segment Messaging screen by clicking on the messages Message hyperlink. The message details appears.

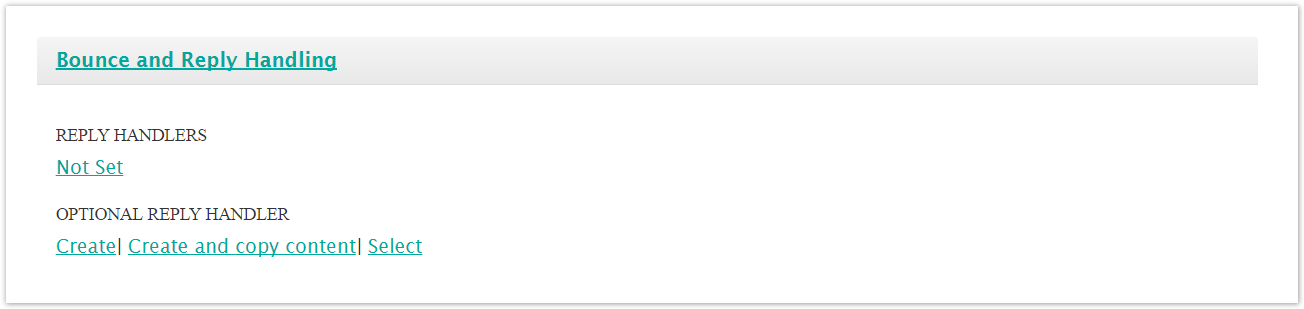
Click the Bounce and Reply Handling section link. The Bounce and Reply Handling section appears.
To set the reply handlers:
Click on the 'Not Set option link in the Reply Handlers section. The reply handler trigger list appears.

Select or deselect the reply handlers that you wish to trigger the campaign:
Email Persistent Bounce Handler: A reply handler that is triggered when a persistent bounce is encountered (error code '5XX')
Email Temporary Bounce Handler: A reply handler that is triggered when a temporary bounce is encountered (error code '4XX')
Email Spam FBL Reply Handler: Triggered when Connect receives an FBL (standard type of feedback loop email that is sent out by most ISPs)
SMS Persistent Bounce Handler: A reply handler that is triggered when a persistent SMS bounce is encountered
Email Context Not Found Handler: A handler that is triggered when an email context is not found
SMS Unsubscribe Handler: A reply handler looking for an unsubscribe action from the customer via SMS
SMS Keyword Handler: A reply handler looking for a specific defined keyword as a trigger
SMS Double Permissions Handler: A reply handler looking for the double permissions subscribe service response as a trigger. The user needs to confirm twice before they are subscribed to a conversation.
SMS Context Not Found Handler: A reply handler that is triggered when an SMS context is not found
Email Change To Text Handler: A reply handler that will change the customer's email preference from HTML to text
Email Unsubscribe Handler: A reply handler looking for an unsubscribe action from the customer via email
Email Auto Reply Handler: A reply handler triggered by the receipt of an out-of-office reply from the customer
Email Challenge Reply Handler: A reply handler triggered by a challenge/response reply
Email Double Permissions Handler: A reply handler listening for the approval from a subscribe campaign that requires double permissions.
Known Mailbox Handler: A reply handler listening for email sent to 'abuse@' or 'postmaster@' email addresses and forwards them to a mailbox specified in the reply handler
Unexpected Reply Handler: A reply handler triggered if the email does not trigger any of the other handlers
DMS Mode Bounce Handler: A reply handler triggered if the message is bounced by a DMS system bounce reply
To cancel without saving any of the reply handler triggers, click the Cancel button. The list of reply handler triggers disappears without any options being saved.
Click the Save button. The list of reply handlers disappears. The list of selected reply handler triggers appears in the Reply Handlers list.
To set the optional reply handler settings you are able to create an event-triggered campaign or to select an existing event-triggered campaign to use for the reply:
To create an event-triggered event that will reply to inbound emails:
Click the Create option link. A bounce event-triggered campaign is created for the reply.

To edit the details of the campaign, click the name link for the bounce campaign, entitled "Bounce ET campaign for interaction [Name of Campaign] Message". For more information on configuring event-triggered campaigns, please see Creating an Event-Triggered Campaign.
To delete the association to the campaign without saving it:
Click the Delete option link. A delete confirmation message displays.

To cancel without deleting, click the Cancel button. The event-triggered campaign is not deleted.
Click the OK button. The campaign is deleted.
To create an event-triggered event with a copy of the existing content from the current campaign that will reply to inbound emails:
Click the Create and Copy Content option link. A bounce event-triggered campaign is created for the reply. The content from the existing message is also copied into the new event-triggered campaign.
To edit the details of the campaign, click the name link for the bounce campaign, entitled "Bounce ET campaign for interaction [Name of Campaign] Message". For more information on configuring event-triggered campaigns, please see Creating an Event-Triggered Campaign.
To delete the association to the campaign without saving it:
Click the Delete option link. A delete confirmation message displays.
To cancel without deleting, click the Cancel button. The event-triggered campaign is not deleted.
Click the OK button. The campaign is deleted.
To select an existing event-triggered campaign to be used for bounces and replies:
Click the Select option link. The Optional Reply Handler Campaign for this Message section appears.

Select the desired event-triggered campaign by selecting the radio button beside the desired event-triggered campaign.
To cancel without saving an event-triggered campaign, click the Cancel button. The Optional Reply Handler Campaign for this Message section disappears. No event-triggered campaign is selected.
Click the Save button.
To delete the association to the campaign without saving it:
Click the Delete option link. A delete confirmation message displays.
To cancel without deleting, click the Cancel button. The event-triggered campaign is not deleted.
Click the OK button. The campaign is deleted.
To cancel without saving any of the bounce and reply handling information, click the Cancel button. The Segment Messaging screen displays without saving the bounce and reply handling information.
Click the Save button. The bounce and reply handling information is saved.