Creating Trial Messages
Prior to sending a main message, you are able to create a trial message. The message is sent to a small random sample of customers in the segment allowing you to gauge the results of the campaign on the smaller sample. If no segments are used, the sample is taken from the "All Segments" segment is used, which represents the entire audience. The random customers are then selected from that group. You are then able to message the other customers based on the success of the trial message, or correct the message and send another trial to another random group to test those results and compare.
Once a customer receives a trial message from a campaign, they are automatically excluded from receiving any messages from the same campaign, be they trial or main messages.
Note: Trial messages are only used for normal campaigns. For more information on normal campaigns, please see Creating a Normal Campaign.
Note: You are able to create as many trial messages for a segment as you wish. But note that you cannot exceed 100% of the target customers in the segment over all of the trial messages.
Note: Once a main message for a segment has been rolled out, no new trial messages are permitted for that segment. As well, if a main message has been rolled out for all segments, no new trial messages can be created for any segment.
You are also able to control the timing of the trial messages as well, sending them sequentially or all at once. As well, your trial messages are able to be used for multiple segments as necessary. With this in mind, trial messages should be sent to small groups so that there remains a larger sized group of customers that are able to receive the main message deemed to be the most successful.
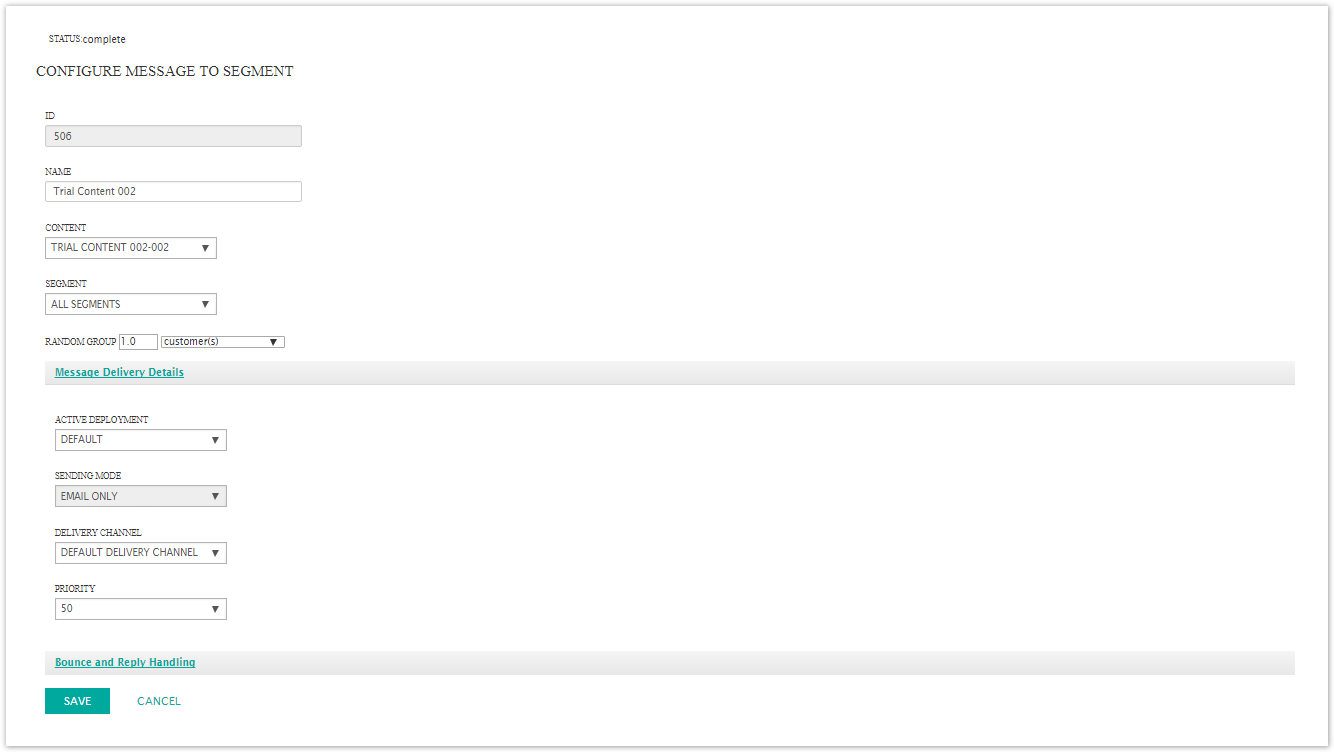
Creating a Trial Message
To create a trial message for a segment:
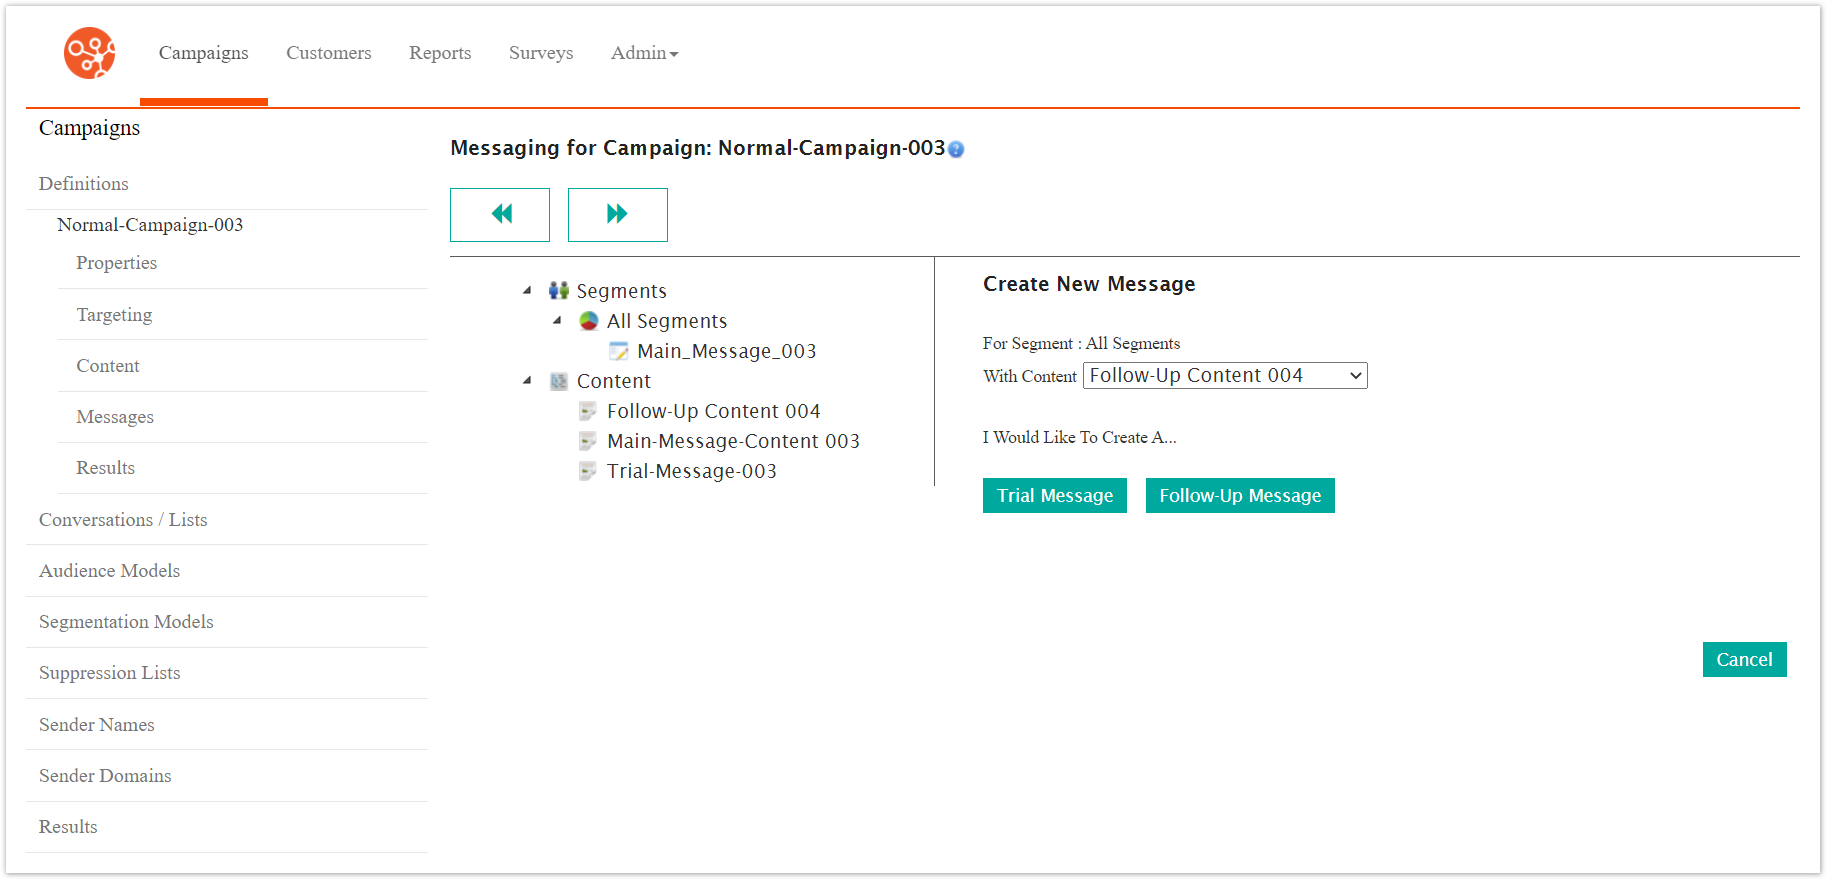
Navigate to the Messages screen by clicking on the Messages sub-tab in the Campaigns screen. In the left-side panel are displayed the segments available to the campaign and the content that has been created.
For more information on campaign segments, please see Segmentation
For more information on creating content for campaigns, please see Creating and Managing Content
Drag and drop the desired content in the left-side panel on to the desired segment in the left-side panel. The Create New Message panel appears in the right-side panel.
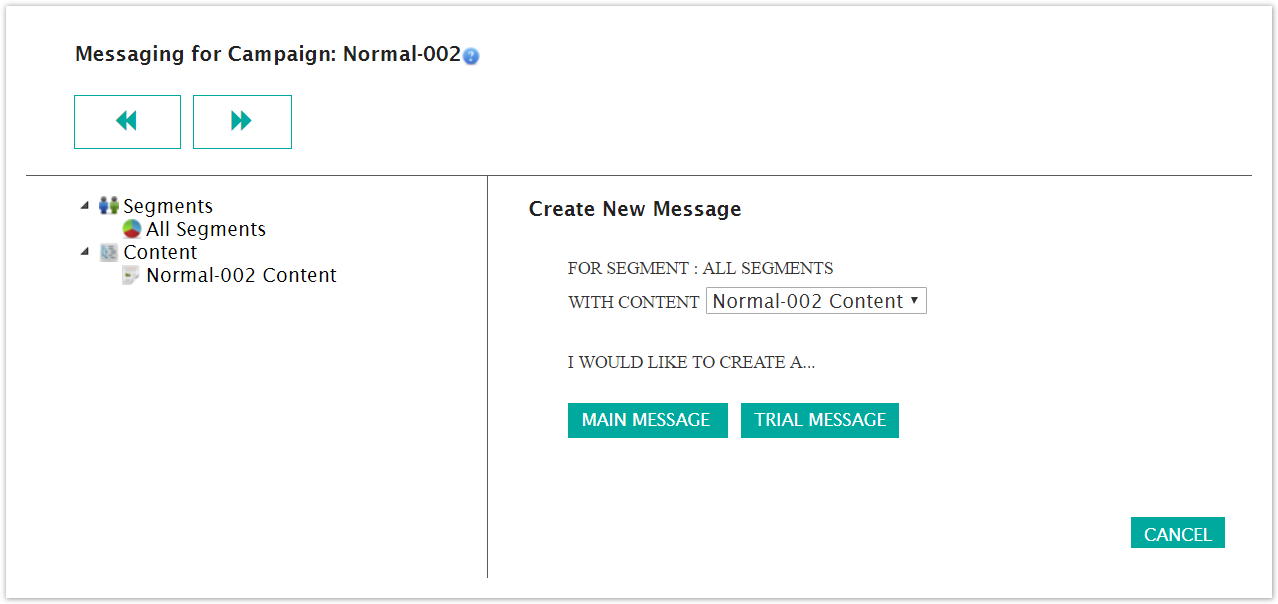
Select the content you wish to send to the segment by selecting it from the With Content dropdown.
To cancel without creating a message, click the Cancel button. The segment and message information disappear.Note: If you cancel the message and decide that you wish to create a message, select the New Message option from the Commands dropdown. The Create New Message details display again.

Click the Trial Message button. The Configure Message To Segment window appears.
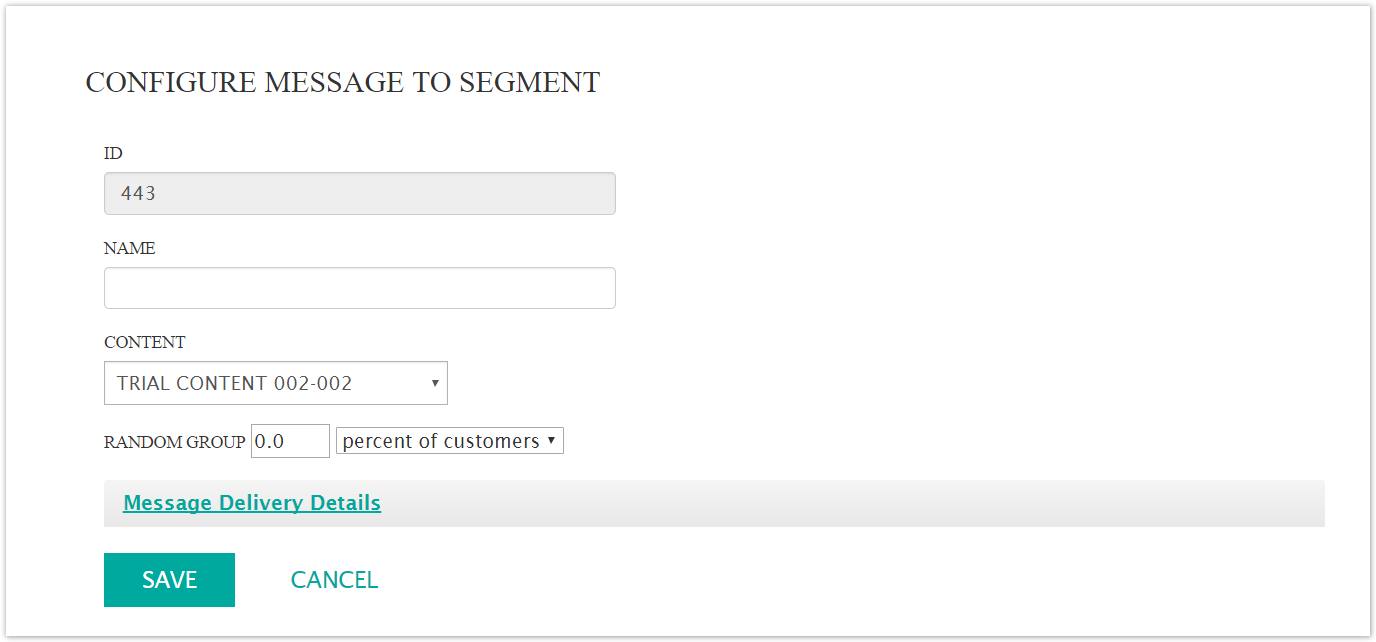
Enter the message details:
Name: The name for the message. This is used internally and not visible to the customer.
Content: The content to be used for the message
Random Group: The size of the group from the segment to be sent the trial message. You are able to enter a percentage of the size of the segment (using 'percent of customers' from the dropdown) or the actual number of customers to be sent the trial message (using 'customer(s)' from the dropdown)
To enter the message delivery details, click the Message Delivery Details link. The Message Delivery Details section appears:
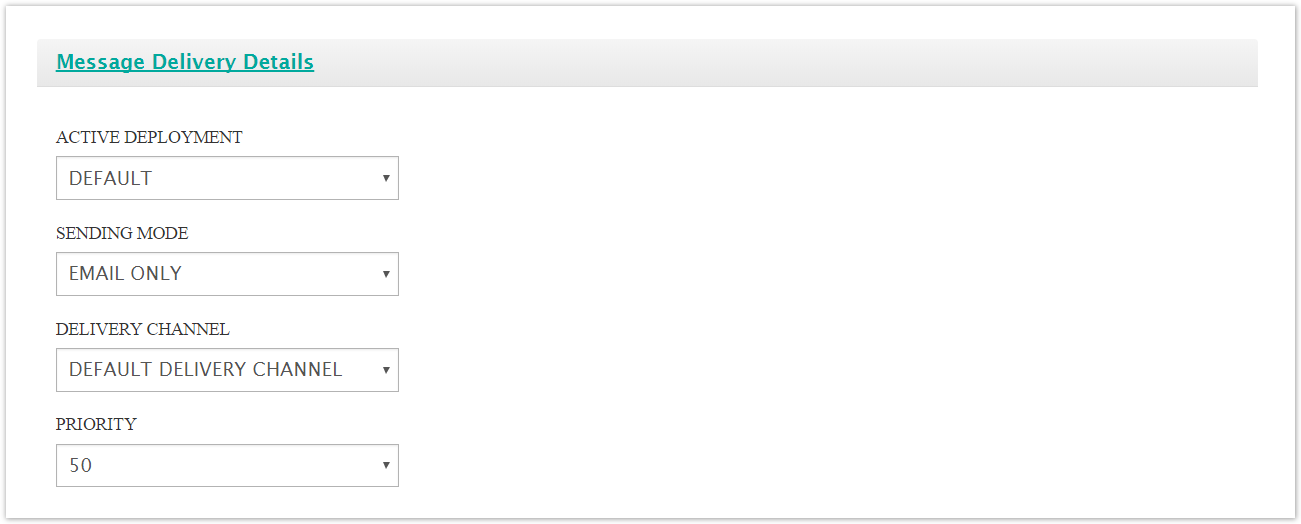
Enter the message delivery details:
Active Deployment: Determines the deployment (i.e. cluster) that will be used to send the message
Sending Mode: Defaults to 'Email Only'
Delivery Channel: The delivery channel used to send the message
Priority: The priority of the message in the message queue. The lower the number the higher the priority (e.g. a message of priority '20' has a higher priority than a message with priority '50')
To cancel without creating the message, click the Cancel button. The message details disappear. You are returned to the Messages screen.
Click the Save button. The message appears underneath the selected segment. The Bounce and Reply Handling section also appears.
Note: Connect allows you configure bounce and reply event-triggered campaigns for a message. That is, if Connect receives a bounce or a reply from a customer following the message being sent, you can configure an event-triggered campaign that will send a message to the customer in this eventuality. For more information on configuring bounce and reply handling settings, please see Configuring Bounce and Reply Handling Messages.