Creating System Reports
Connect allows you to create reports as well. The reports you create can help you customize your reporting view for your instance of Connect.
Creating System Reports
To create a new system report:
Navigate to the Deployments screen. The Deployment Editor screen displays.
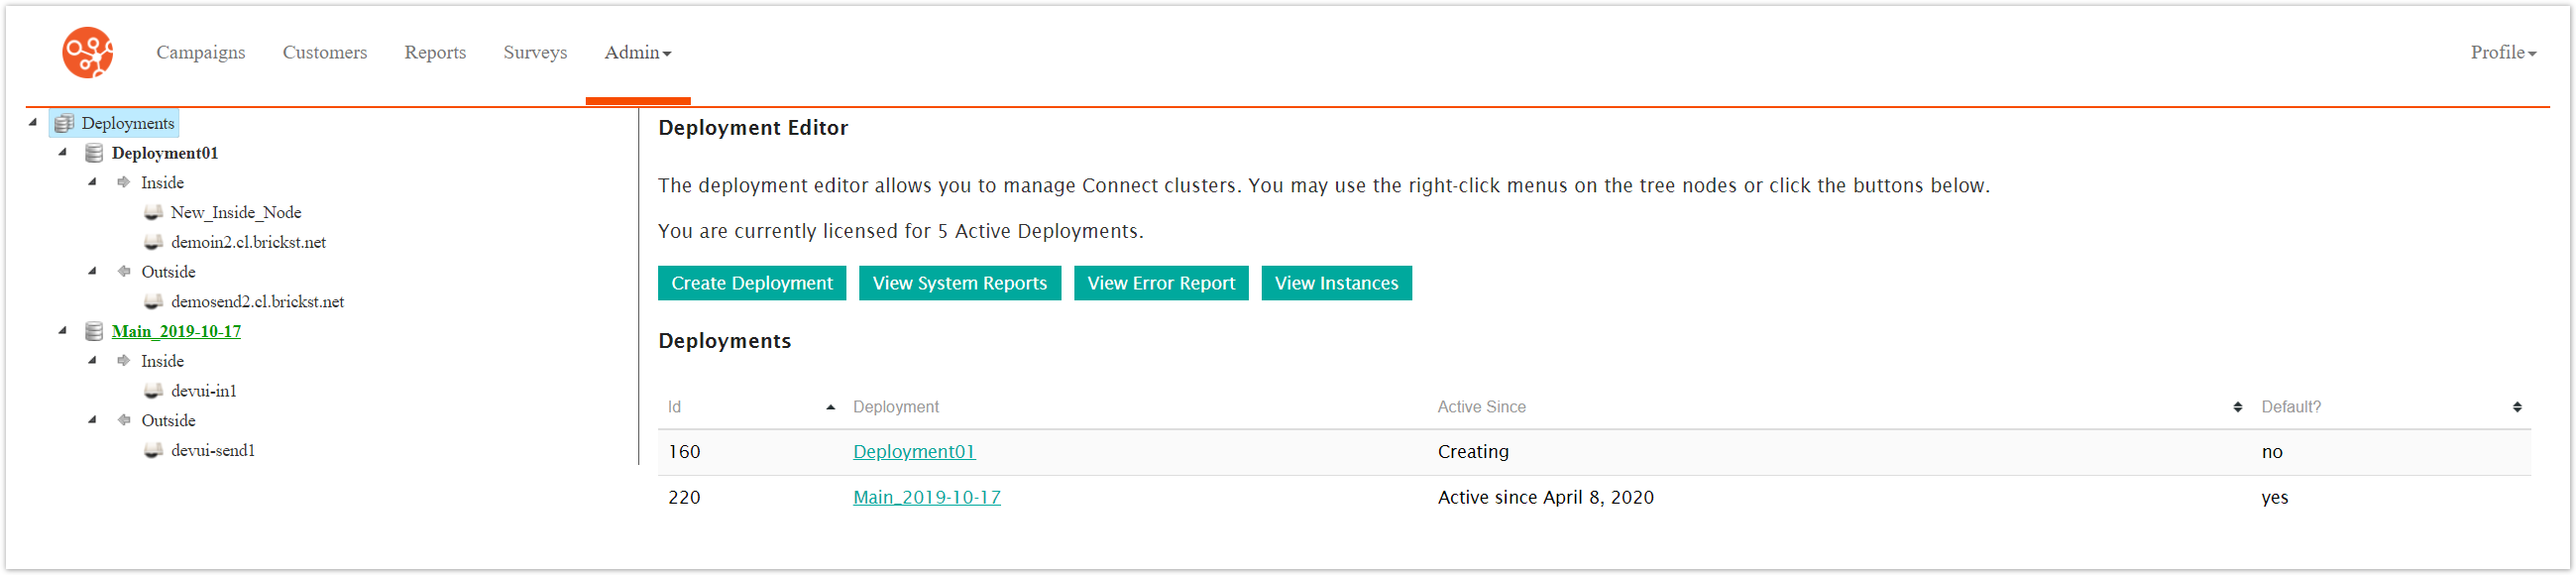
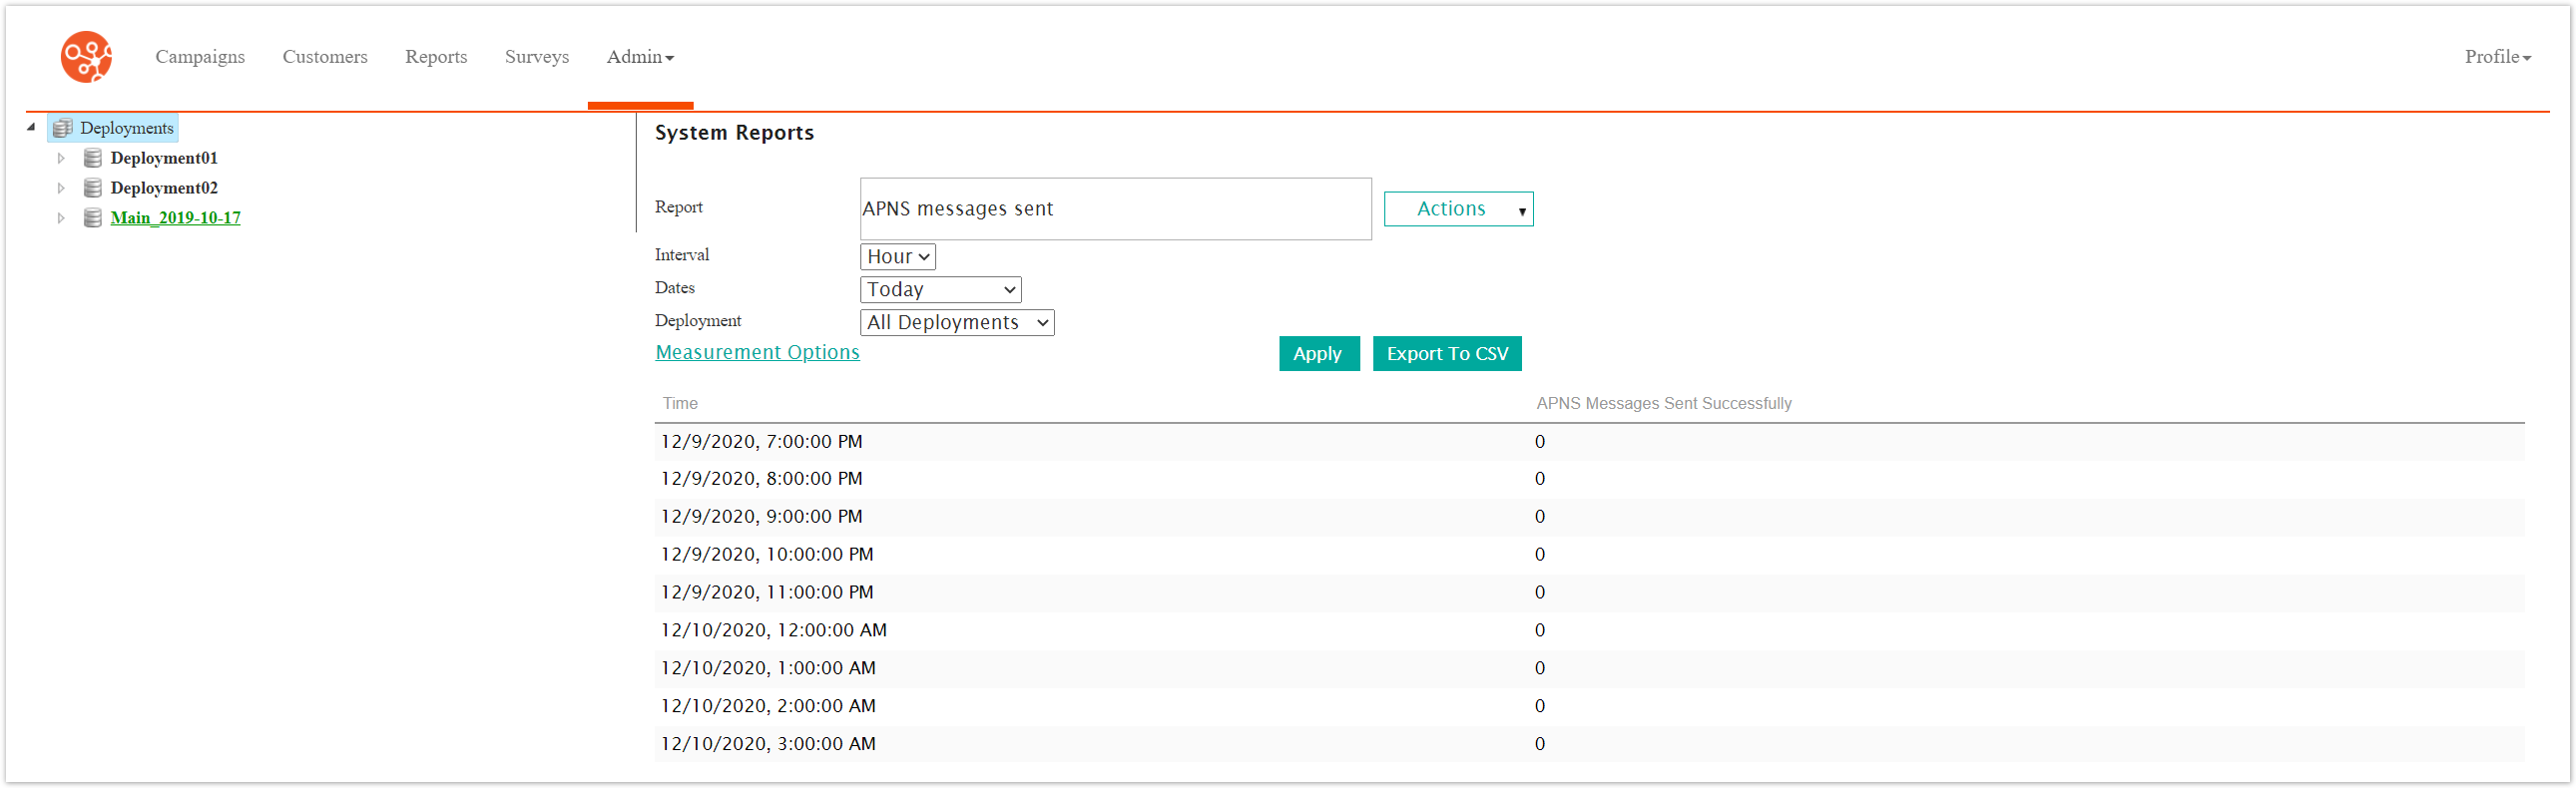
Click the View System Reports button. The System Reports screen appears.
In the Actions dropdown, select New Report.
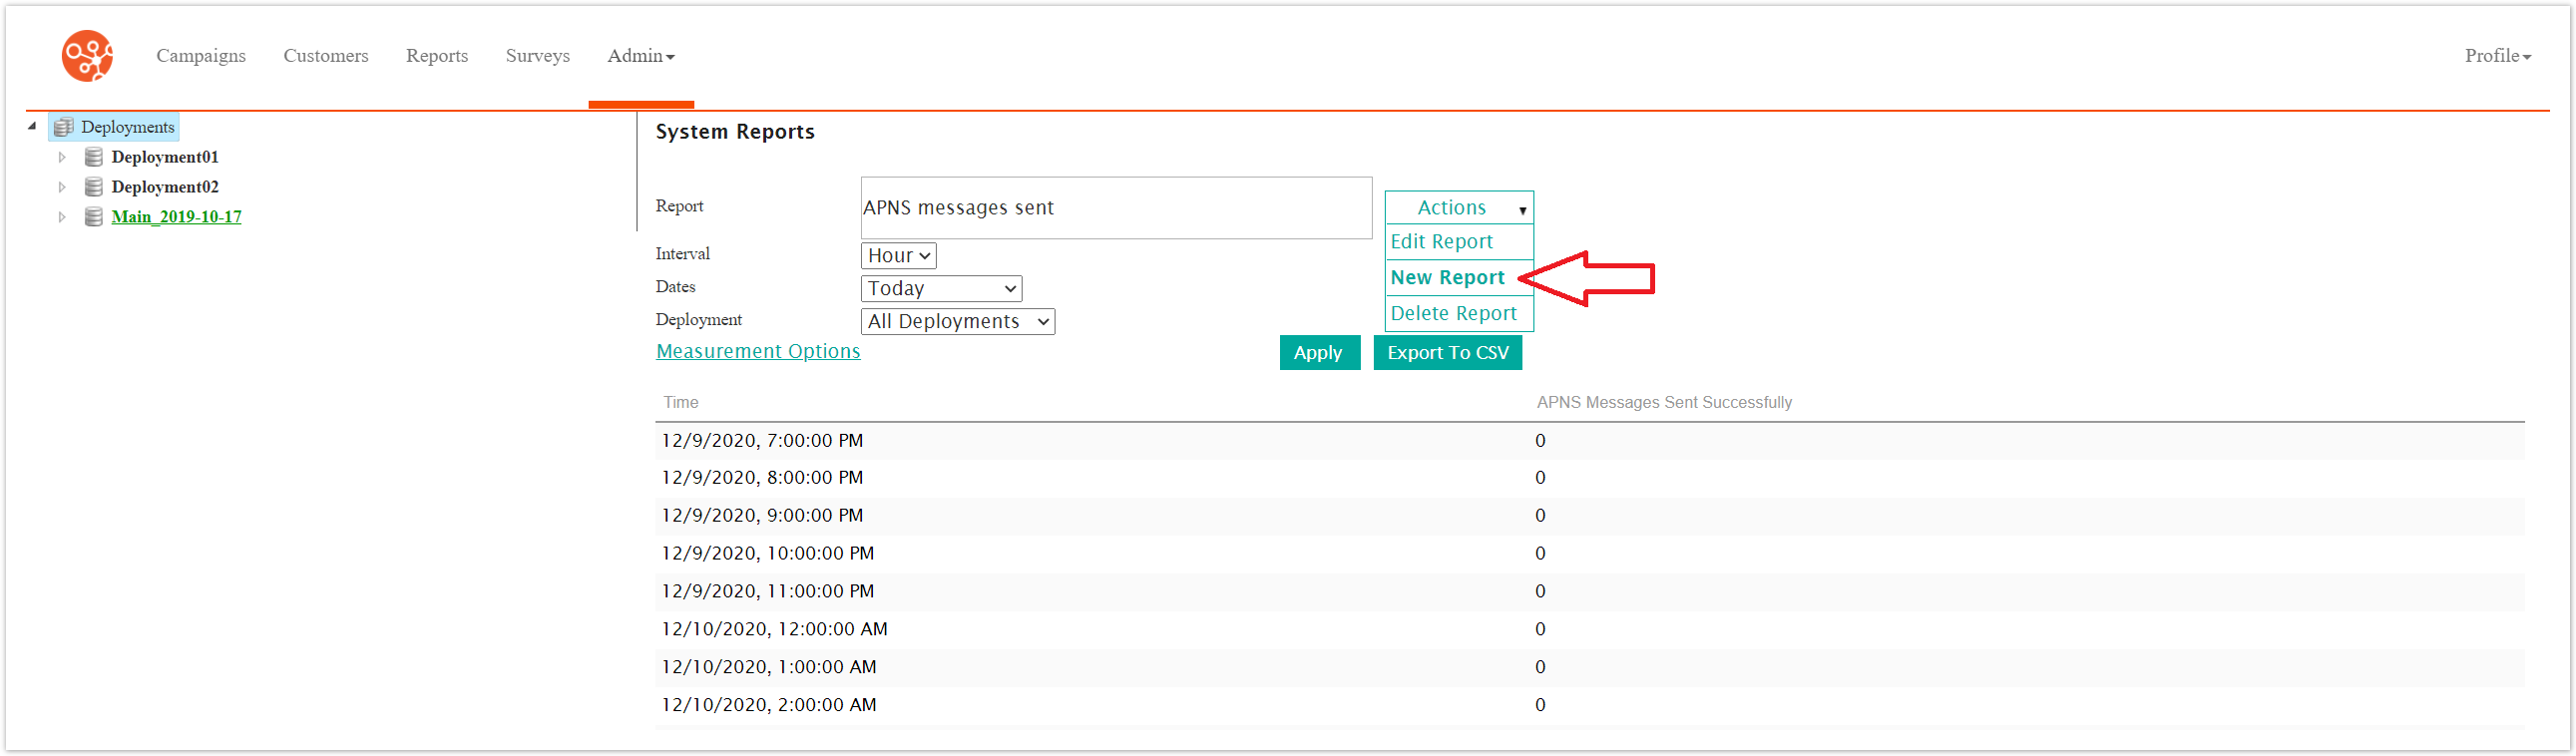
The Edit Report screen appears.

Enter the report details:
Report Name: The name for the report
Report Measurement by Machine: Flag indicating that the results will be broken out by each machine
To add reporting components to the report:
To expand a reporting category, select the Expand Category icon (
 ). The underlying report components for the report category display.
To contract a reporting category, select the Contract Category icon (
 ). The underlying report components are hidden beneath the report category.
Select the desired reporting component. The details for the reporing component display in the right-side panel.
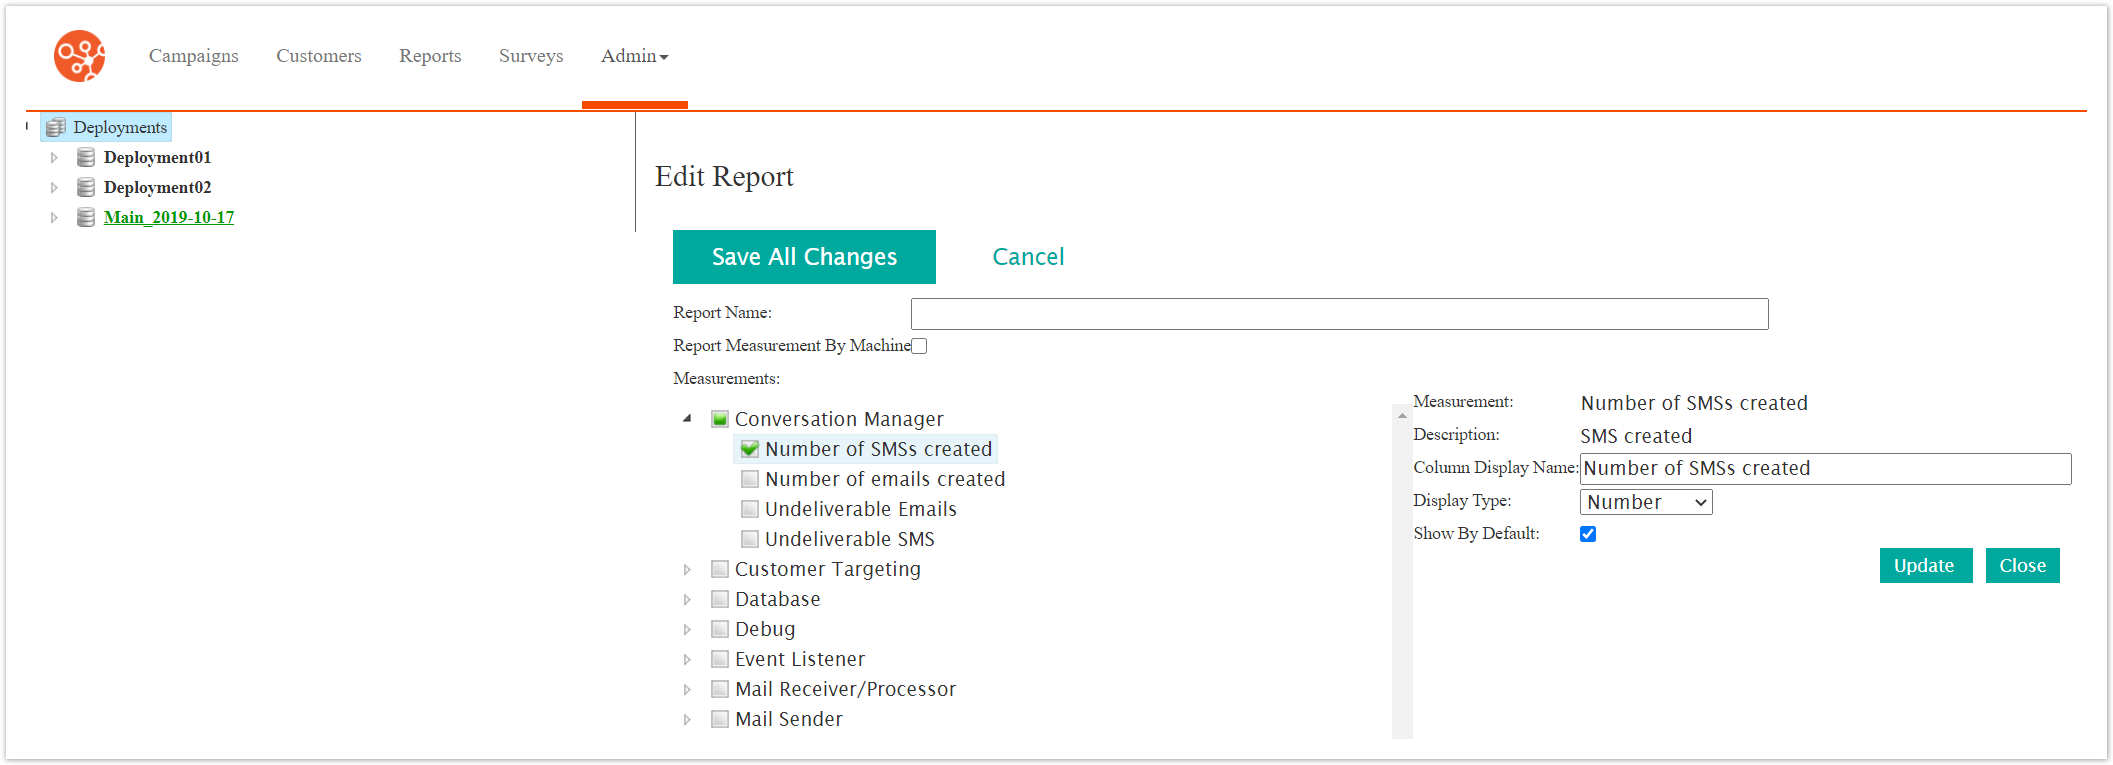
Edit the values of the report component as desired:
Column Display Name: The name for the column that will display in the report
Display Type: The data type that will be displayed (e.g. 'Number', 'Decimal')
Show By Default: Indicates whether this column will display as a default for the report
To close without including the report value in the report, click the Close button. The report value is removed from the right-side pane.
Click the Update button. The measurement is updated and added to the report.
To cancel without saving the report, click the Cancel button. The System Reports screen displays. The report is not saved.
Click the Save All Changes button. The System Reports screen displays. The report is saved and now displays in the list of reports.