Adding Rules to Surveys
Customer surveys perform three main functions
Creating and updating customer records
Actions such as subscribing and unsubscribing customers from conversations, or creating events for triggered event campaigns
Make decisions based on the information gathered by the survey as well as information in the Enterprise Marketing Automation database. For example, if the customer expresses interest in a certain product, you can show the customer a web page about that product after they complete the survey
Survey rules process the data collected by the survey and perform actions based on the rule structure. For example, a survey rule can perform the following:
Use survey answers to create a new customer record for a new customer
Submit a collateral request for the customer
Customize the next web page that the customer sees
Note: You are able to create as many rules as you wish for a survey. It should be noted that if a rule fails in a survey, no other subsequent rules will be executed.
Adding a Rule to a Survey
To add a new rule to a survey:
Navigate to the Surveys screen.

Select the desired survey. The survey displays in the Define Survey screen.

In the Define Survey screen, click the Rules submenu heading. The Define Rules screen appears.
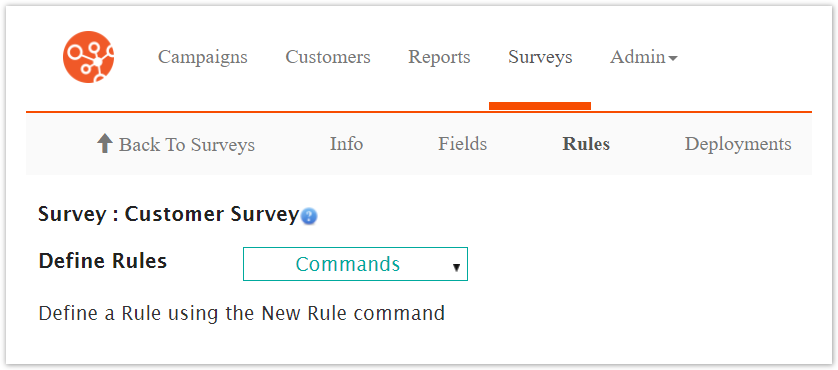
From the Commands dropdown, select the New Rule action.

The Select Rule Action screen appears.
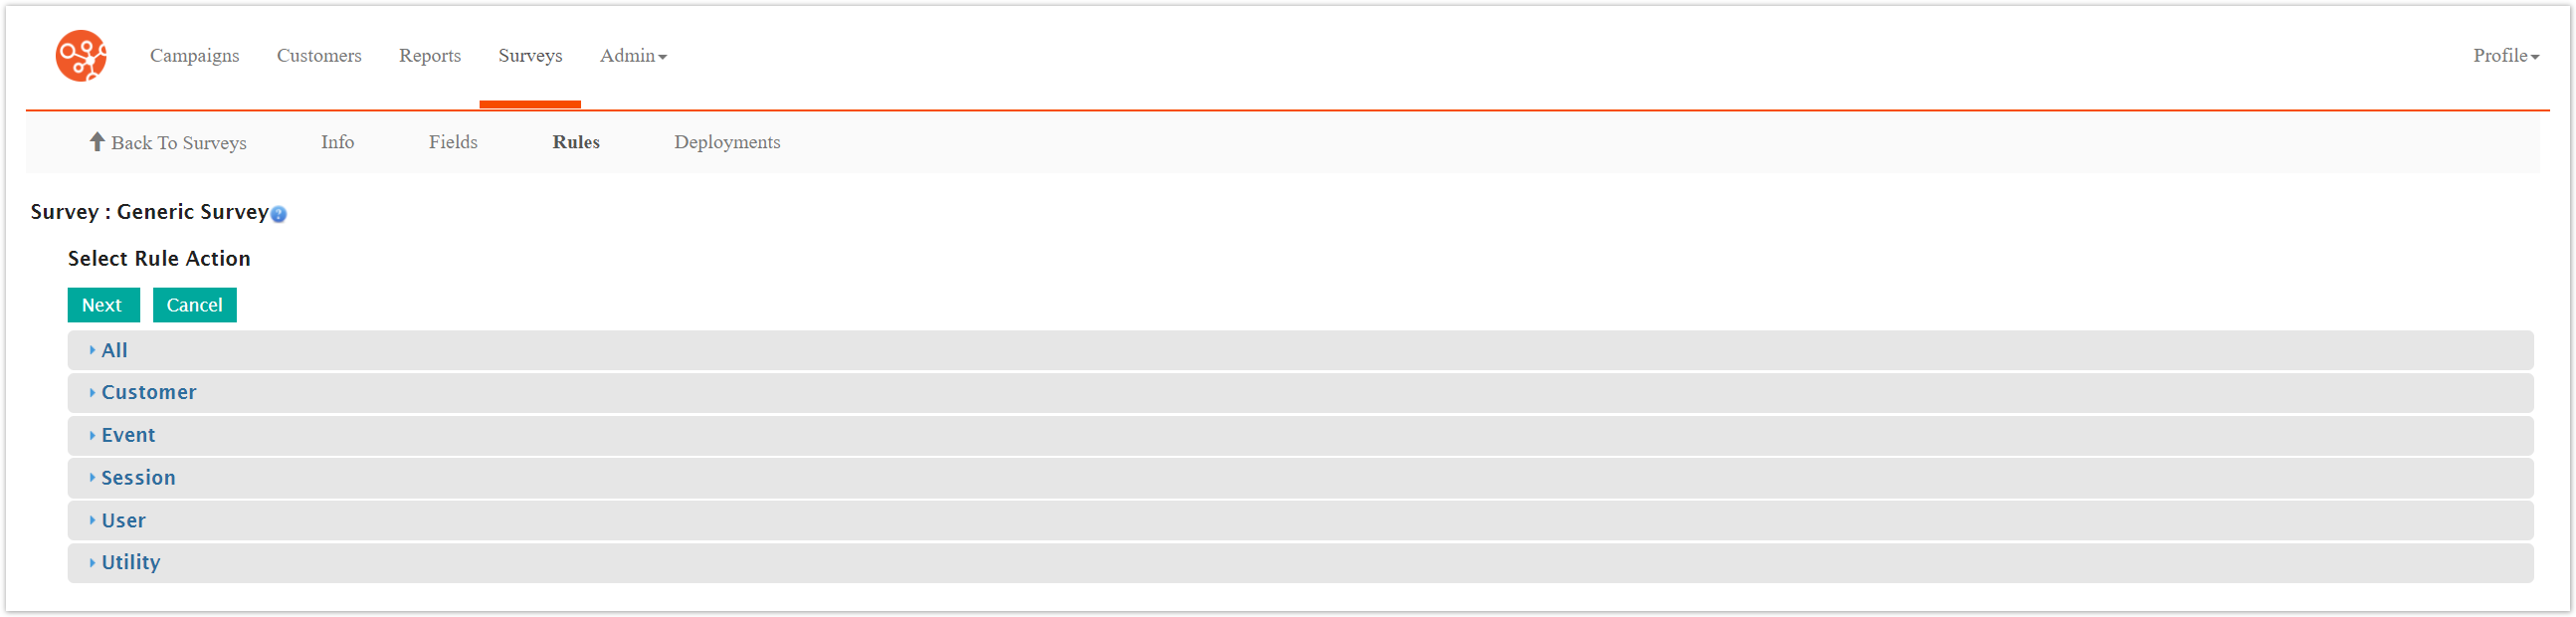
Click the desired rule action category:
All: Displays all available rules across all categories, listed alphabetically
Customer: Rules related to customer attributes and behaviour (e.g. Customer attribute or conversation associated to the customer)
Event: Rules based on event-triggered campaign behaviour (e.g. fetch campaign based on related event)
Session: Rules based on the active session of the survey (e.g. set the next URL that the customer sees upon completing survey)
User: Rules based on the Connect user (e.g. send email to group of Connect users)
Utility: Rules used to trigger an action in Connect (e.g. fetch field in Connect)
Note: The same rule categories are used in configuring event handlers. For more information on the individual rule categories and individual rule properties, please see List of Event Handler Rule Actions.
Click on a desired rule. The rule is highlighted.
Note: The same rules are used in the configuring of event handlers. For more information on the function of survey rules, please see List of Event Handler Rule Actions.To cancel without committing the rule, click the Cancel button. The Define Rules screen displays.
Click the Next button. The Edit Rule - XXX window appears, where 'XXX' is the name of the selected rule.
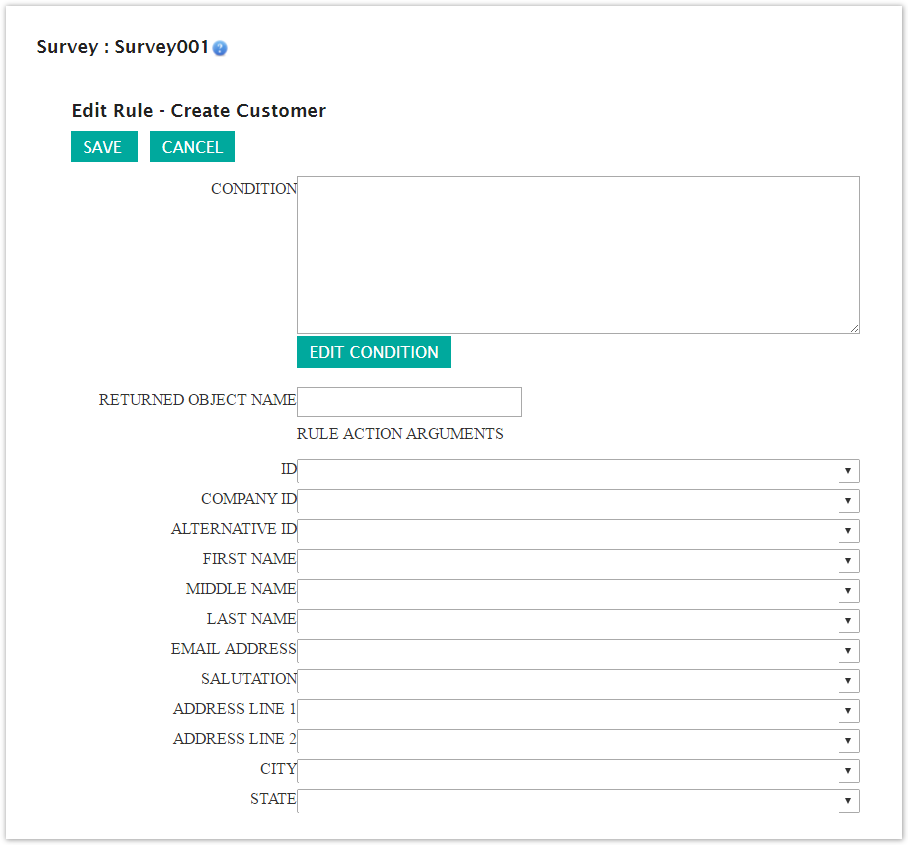
Note: Each rule will have differing properties that need to be configured in order for the rule to function properly. For a description of each rule's properties, please see List of Event Handler Rule Action Properties.
Click the Edit Condition button. The Edit Condition field appears with rule operands available:
Rule Operands: AND, OR, NOT
Condition Operands: ADD, DELETE
Rule Position Commands: UP, DOWN
In the Condition field, click the Set Clause... link.
Configure the rule as required. For more information on rule operands and conditions, please see List of Event Handler Rule Action Properties.
To cancel without saving any of the rule properties, click the Cancel button. The rule conditions are not saved.
Click the Save button. The rule condition is saved. The Edit Rule screen appears.
To cancel without saving the rule, click the Cancel button. The Define Rules screen appears. The rule is not saved.
Click the Save button. The Define Rules screen appears. The rule is saved and displayed in the survey list of rules

.
Note: Warning! With an Opportunity survey or Event Registration survey, you cannot use the Set Next URL rule action to point to the URL of a Contact survey. If you do this, and you try to submit the Contact survey, you will get an Opportunity not in context error.